Connecting Belco
Last updated: August 7, 2026
Prerequisites
A Belco account with admin access
A team created in Belco (e.g., "Engaige") for routing conversations to the AI agent
A default assignment rule in Belco that auto-assigns incoming conversations to that Engaige team
Step 1: Connect Belco in Engaige
Go to Settings > Integrations in the Engaige dashboard
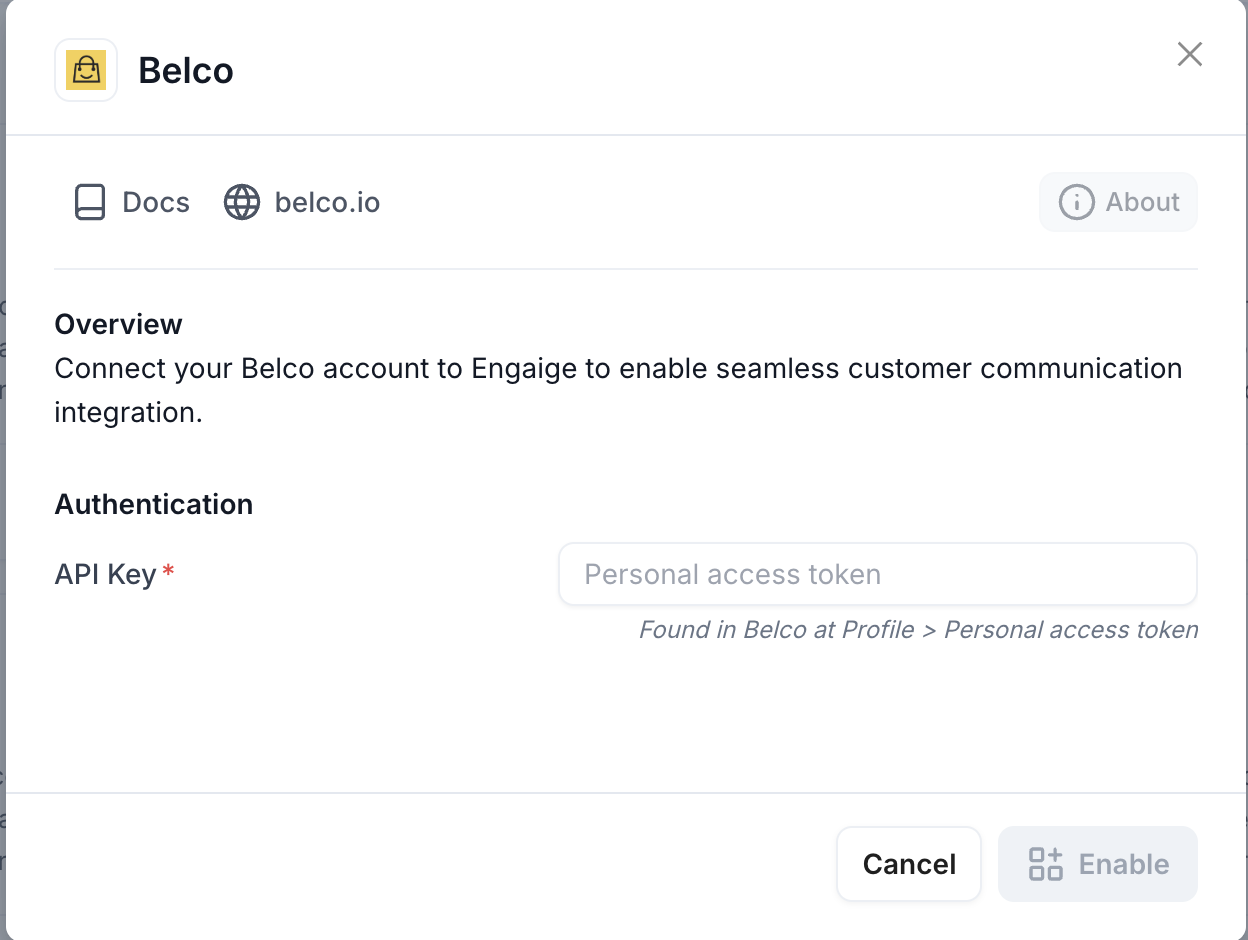
Click Belco > enter your Personal Access Token (found in Belco at Profile > Personal access token)
Click Enable
The integration will verify your token, resolve your user ID and sync your Belco teams automatically. Engaige will also automatically register the webhook(s) in your Belco account, one per shop/brand. No manual webhook configuration is needed.
Step 2: Link an AI Agent
Go to your AI Agent's settings in the Engaige dashboard. Select the type of agent you want to activate (Agent Assist/Autonomous on Email or Chat)
Under Support Queue, select the Belco team you want the agent to be active in (e.g., "Engaige")
Configure handover behavior as needed (e.g., "Assign to queue")
Step 3: Configure Routing in Belco
Make sure incoming conversations are auto-assigned to the team linked to your agent. There is a small difference in how to do it for e-mails versus chats. Both channel types are explained below.
Email:
In Belco, go to Settings > Automation and workflow > Business rules
Add a new business rule. For email, you would need to configure something similar to:
Trigger: When > Conversation is Created -> execute immediately/after a certain delay
Conditions: when Channel is Email
Actions: Assign team - Engaige
Feel free to add conditions you'd like to this business rule.
Chat:
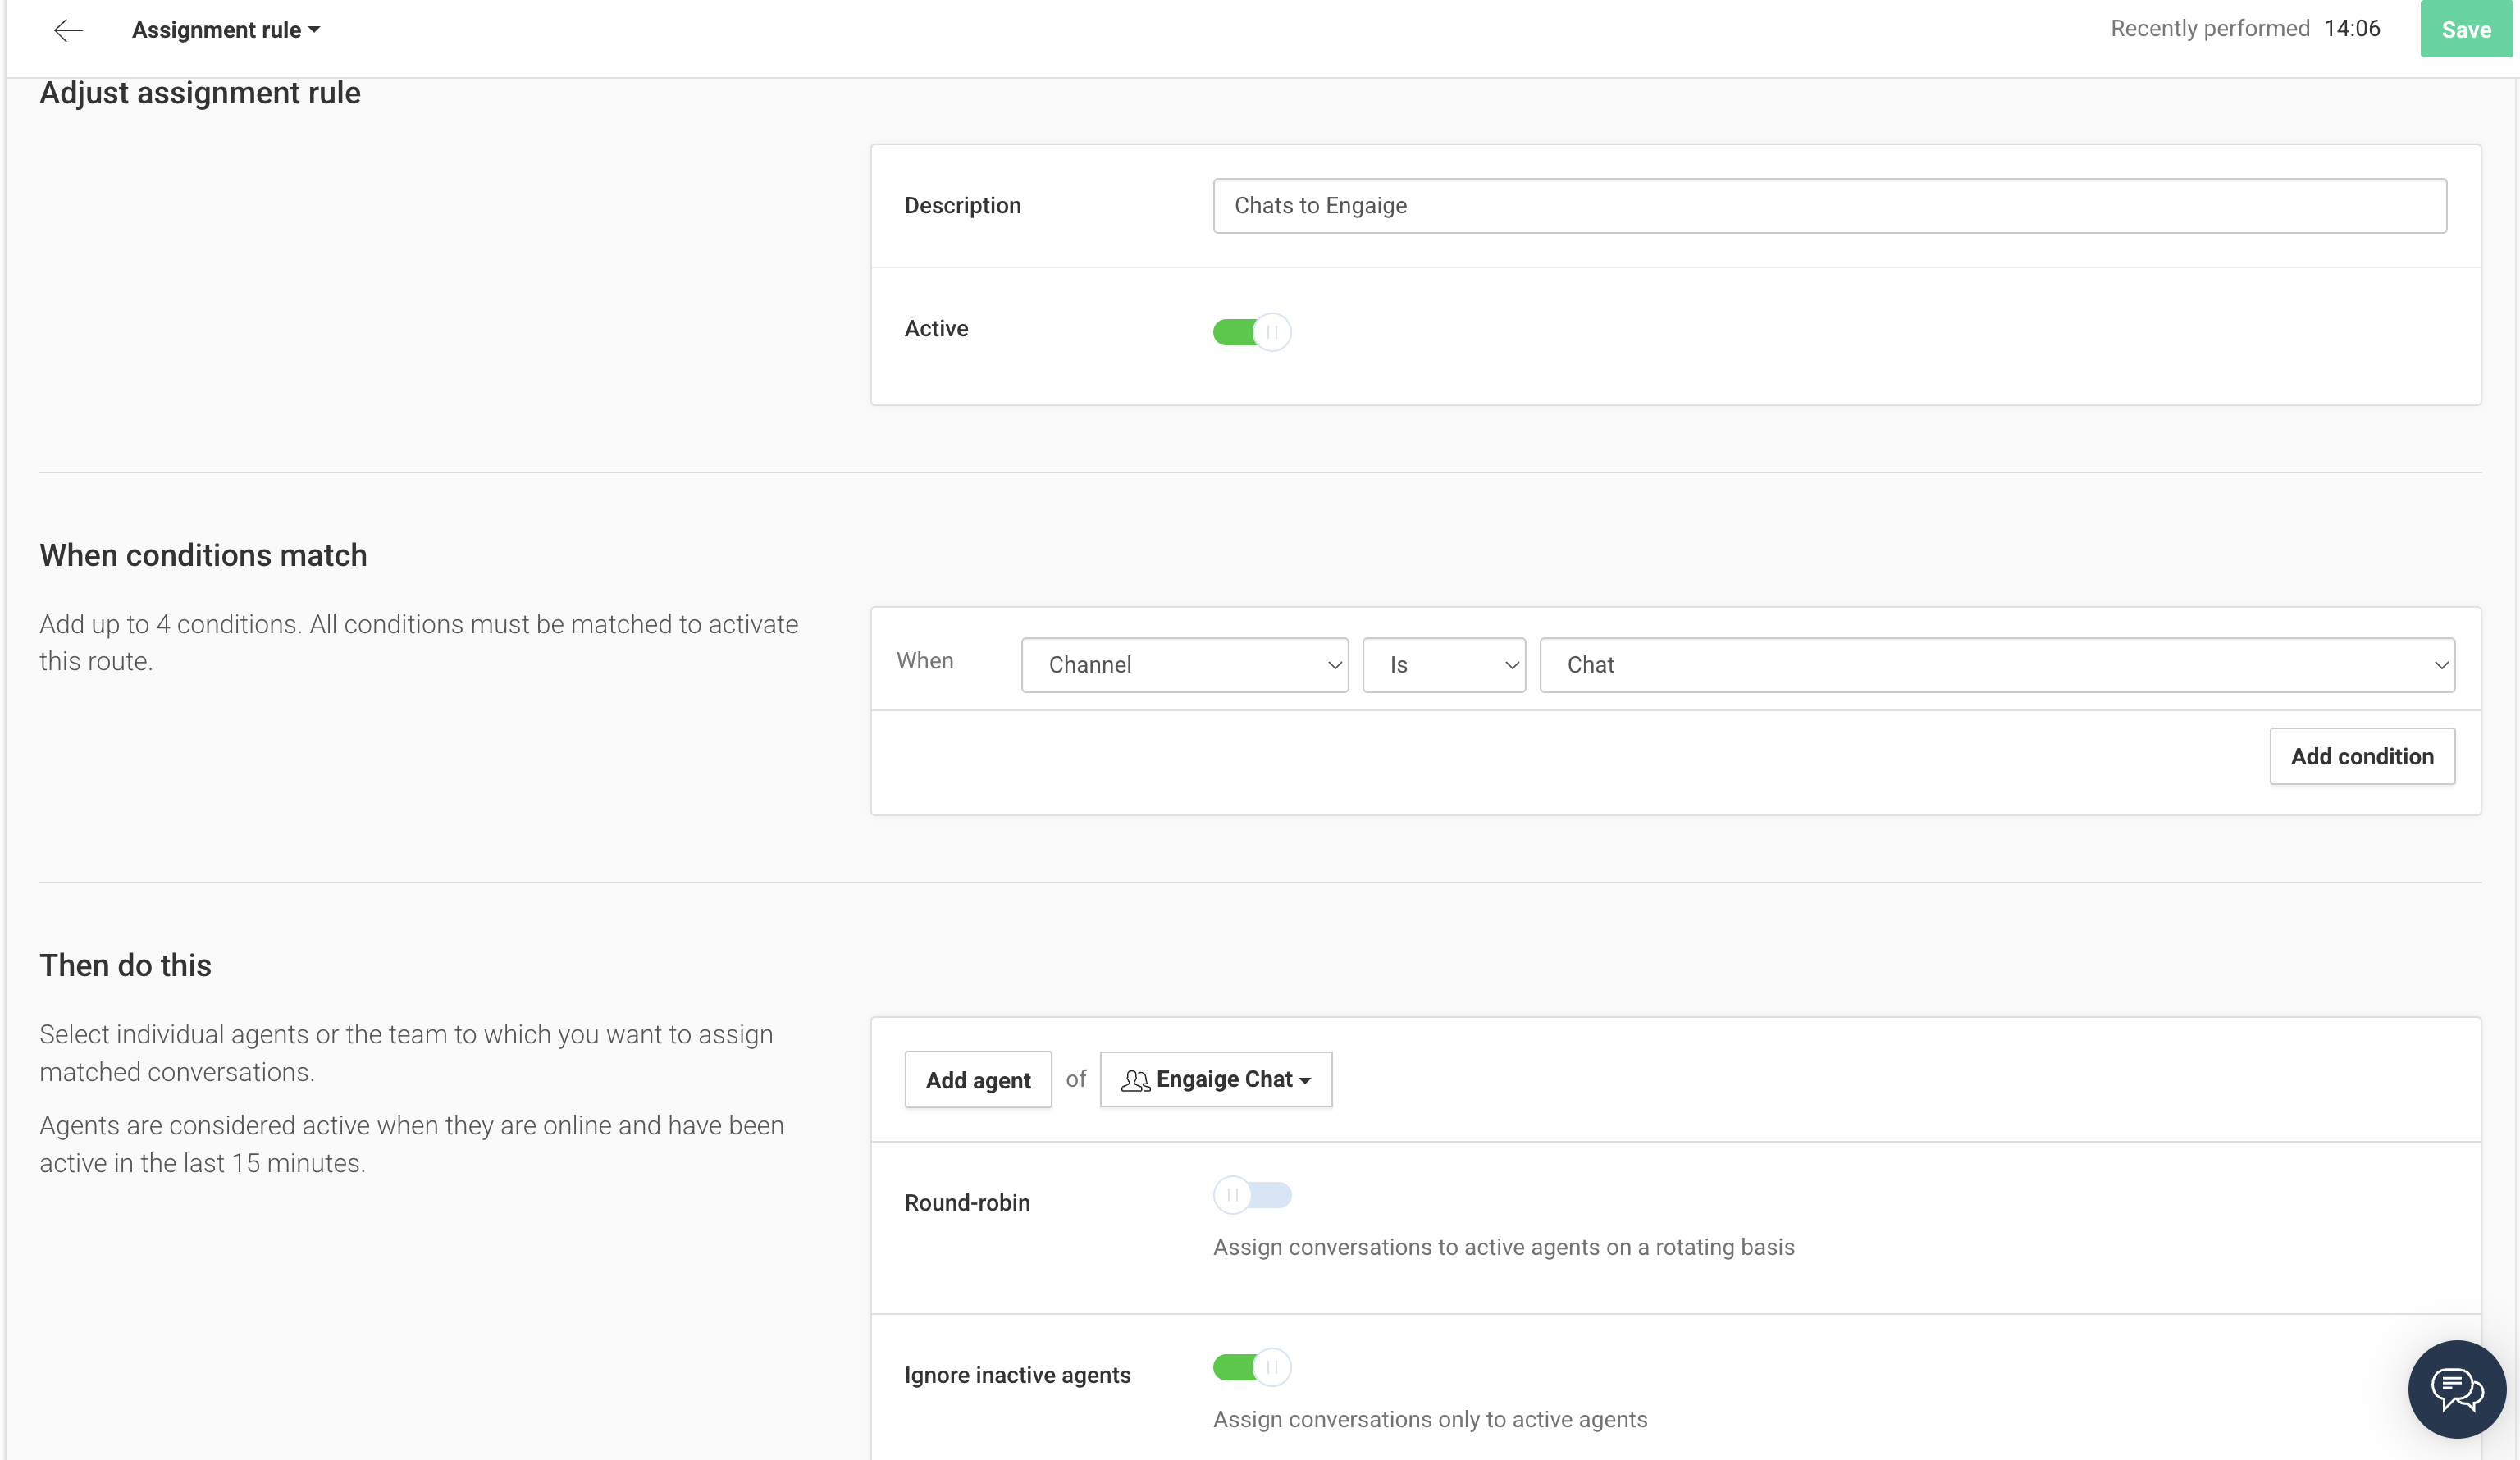
In Belco, go to Settings > Automation and workflow > Assignment rules
Edit the default assignment rule or the assignment rule you want or add a new rule. For chat this could be something similar to:
When > Channel > is > Chat -> assign team Engaige
Select the Engaige team (not an individual agent)
Save
Testing
Send an email to your Belco support address (e.g., support@yourshop.belcomail.io). The conversation should:
Arrive in Belco and auto-assign to the Engaige team
Trigger a webhook to Engaige
The AI agent processes and replies
The reply appears in Belco's inbox and is sent to the customer
Chat works the same way through the Belco widget, no extra configuration needed.
Important Notes
Degraded status: If the integration shows as degraded, the webhook hasn't been discovered yet. Configure it in Belco and run Setup & Sync
Re-syncing: If you make changes in your Belco account such as adding a new shop/brand or regenerating your API token, go to the Belco integration card in Engaige, click Connected > Setup & Sync to re-register the webhooks and sync your teams.