Connecting Freshdesk & Freshchat
Last updated: May 7, 2026
Connect your Freshdesk and Freshchat helpdesk to let your AI Agent read tickets, handle live chats, draft responses, and resolve customer inquiries automatically.
Freshworks consists of two parts that can be integrated:
Freshdesk (for ticket support)
Freshchat (for live chat)
You will need Admin access to your Freshworks environment to follow the steps below. Before starting, you must create a dedicated email address for the Engaige agent, which must be created and managed you as a customer, not by Engaige.
Step 1: Log in to Freshworks Admin Center
Log in to your Freshworks Admin Center with the e-mail address you created for the Engaige user, not with your own e-mail address. Remember you first need to set this profile as admin and to grand administrator privileges to this user.
From your dashboard, you will see your available account.
Click on your Freshdesk or Freshchat, depending on which integration you want to enable. Follow Step 2 for Freshdesk. Follow Step 4 for Freshchat.
Step 2: Get Your Freshdesk Credentials
To connect Freshdesk, you will need:
Your Freshdesk domain
Your Freshdesk API Key
2.1 Find Your Freshdesk Domain
Open your Freshdesk dashboard.
Look at the URL in your browser.
Example:
https://companyname.freshdesk.comWe only need:
companynameThis is your subdomain.
2.2 Get Your Freshdesk API Key
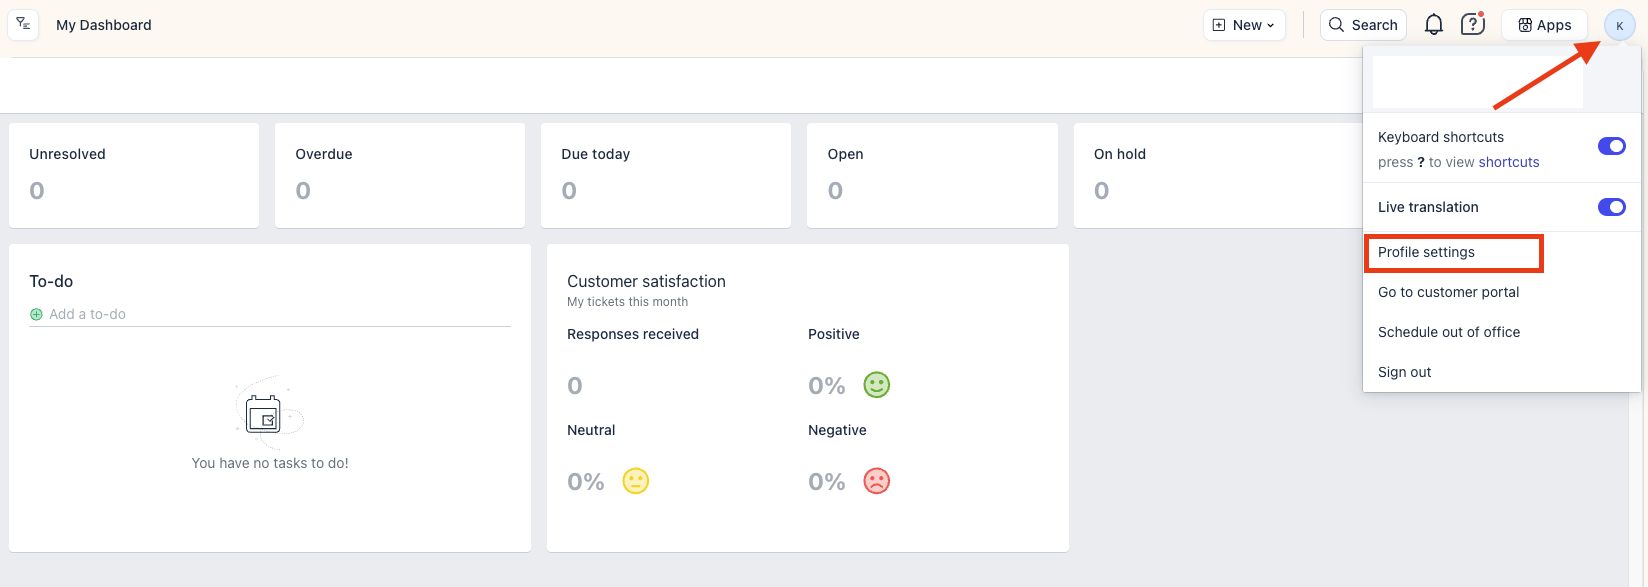
In Freshdesk, click on your profile icon in the top-right corner (your first initial).
Click Profile Settings.
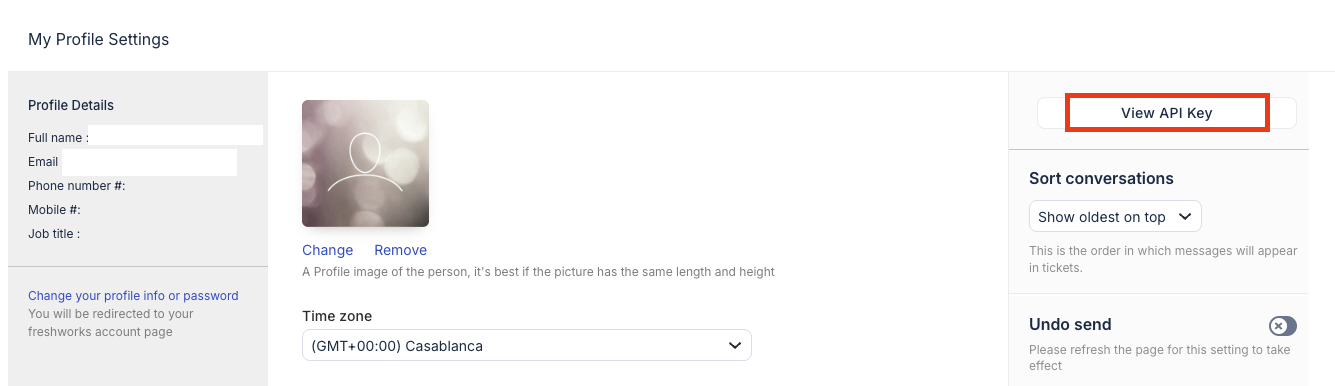
On the right side, click View API Key.
Complete the CAPTCHA if requested.
Copy your API Key.
You will need this in the Engaige dashboard in Step 3.
Step 3: Enable Freshdesk in Engaige
Open your Engaige Dashboard in a new tab.
Go to Settings → Integrations.
Locate Freshworks and click Enable. A modal will appear.
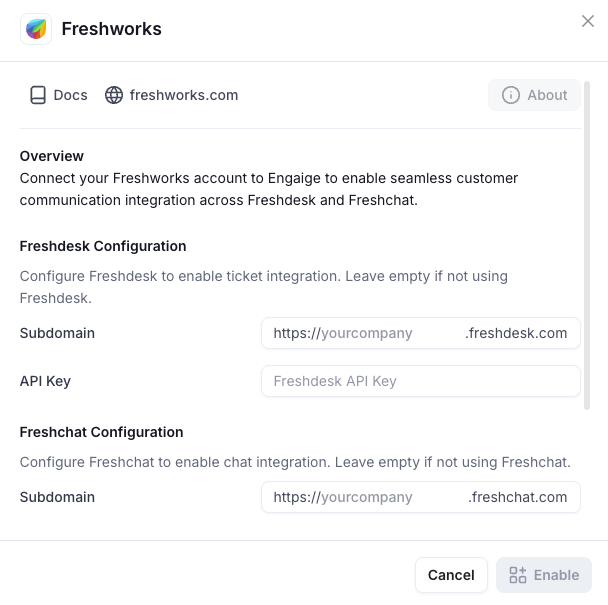
Fill in the Freshdesk details:
Subdomain: Your company name that you find in the url (e.g.,
companyname)API Key: Paste your Freshdesk API key
Click Enable. If the credentials are correct, Freshdesk will show as Enabled successfully.
Step 4: Connect Freshchat
Log in to your Freshworks Admin Center with the e-mail address you created for the Engaige user, not with your own e-mail address. Remember you first need to set this profile as admin. All Freshchat credentials must be generated while logged in as this user.
Step 5: Get Your Freshchat Credentials
5.1 Find Your Freshchat Domain
Go back to your Freshworks dashboard.
Click on your Freshchat instance.
A new tab will open.
5.2 Get Your Freshchat API Key
Make sure you are logged in as the dedicated Engaige agent user.
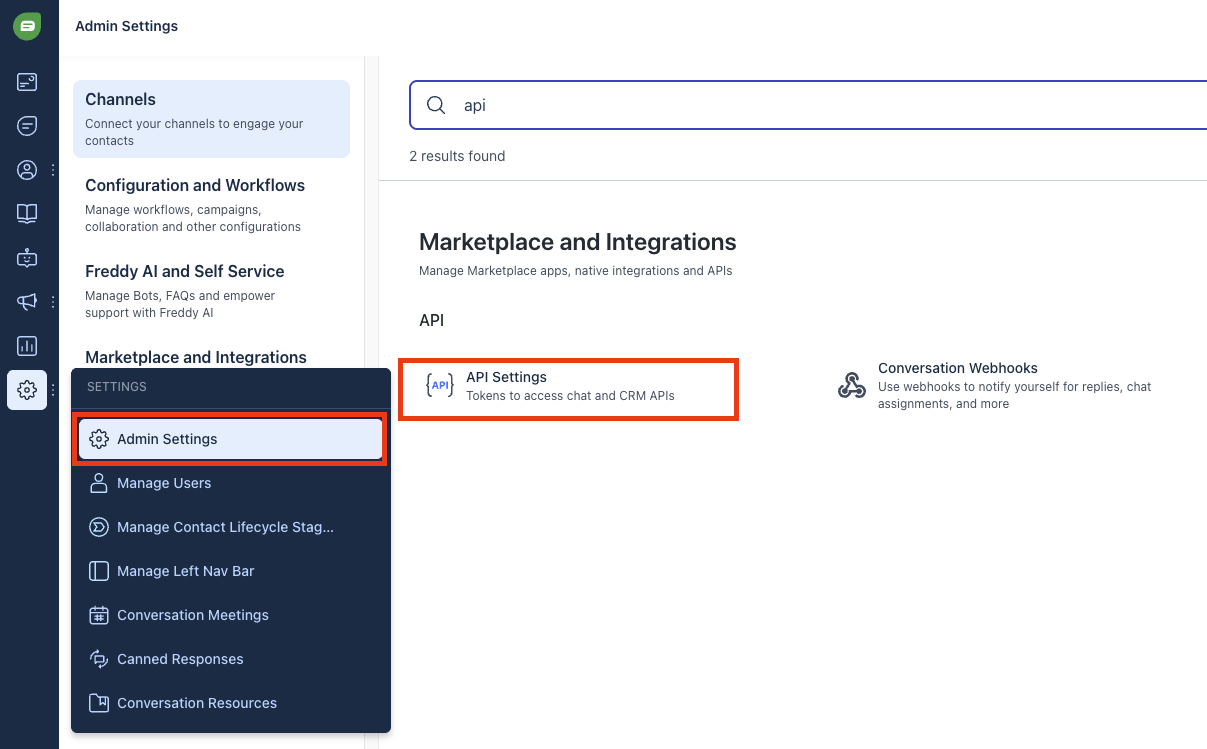
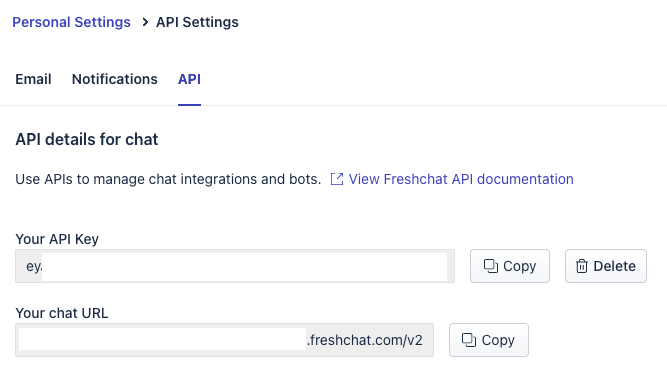
In Freshchat, go to Admin Settings.
Use the search bar and search for API Settings.
Click API Settings.
Complete the CAPTCHA if requested.
You will see the API details: Your API Key and Your chat URL
5.3 Get the Agent Email
You will also need:
The email address of the dedicated Engaige agent user
Example:
engaige@yourcompany.comThis email must match the user you created earlier.
Step 6: Enable Freshchat in Engaige
Go back to your Engaige Dashboard.
Open Settings → Integrations → Freshworks.
Open the Freshworks configuration.
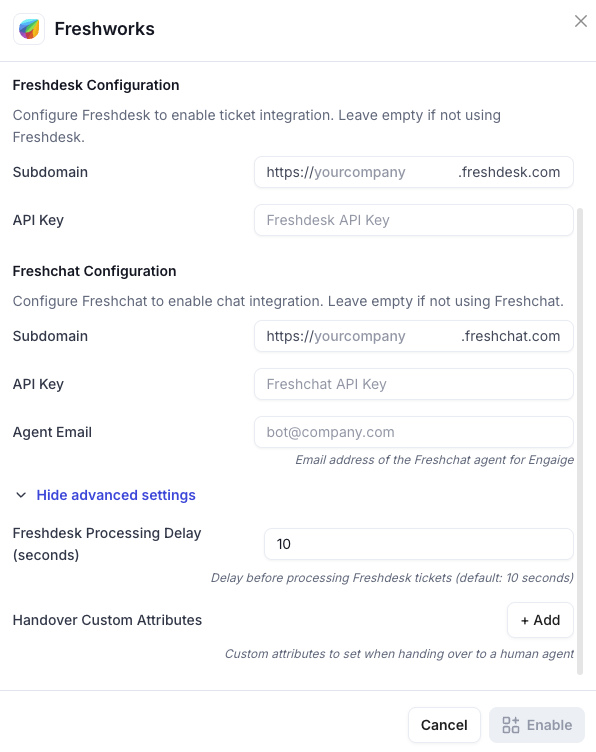
Fill in the Freshchat details:
Subdomain: the domain you find in Your chat URL. Only fill in the part before
freshchat.com/v2API Key: Freshchat API key
Agent Email: Email of the dedicated agent user
Click Enable.
If successful, you will see a confirmation message in Engaige.
At this stage, Freshdesk and Freshchat are technically connected.
Note: This does not yet activate the AI agent in your chat flows. To activate AI Agents in your Freshworks, you can follow this set-up guide.
Step 8: Integration Complete
Once all steps are completed:
Freshdesk tickets are connected
Freshchat conversations are connected
Chats are routed correctly
Engaige can now operate in both systems
Your integration is now ready.
AI activation and routing can be configured in the next setup phase.