Creating & Editing Knowledge Manually
Last updated: February 25, 2026
You can create new knowledge documents and edit existing ones directly inside the Engaige dashboard — no CSV upload or file management required.
Creating a New Document
Use the Add knowledge modal to write content on the fly.
Go to Training → Knowledge.
Click + Add knowledge (top right).
Select Create documents manually.
Pick or search for the folder you want to add the document to.
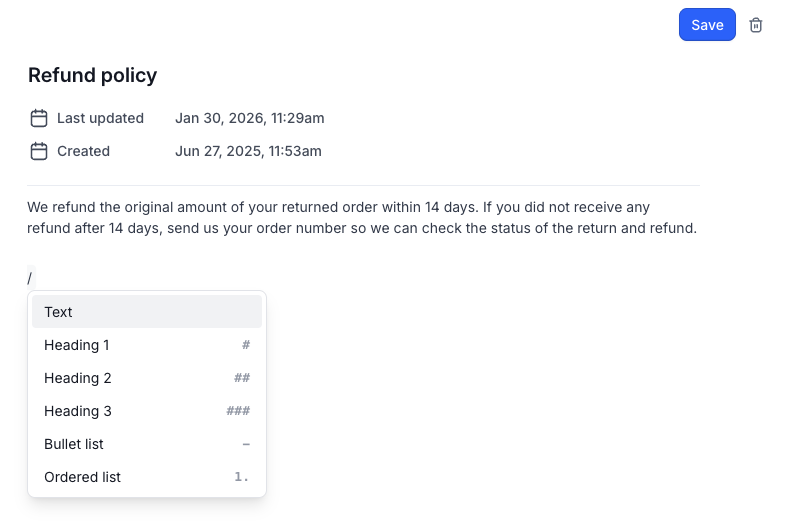
Write a title and add your content. Type
/in the editor to insert formatting (headings, lists).Click Save. The document is live immediately.
Adding a document from inside a folder
If you're already browsing a folder, you can add a document directly from the folder view:
Open the folder in Training → Knowledge.
Click the + Add document button at the top of the document list.
Fill in the title and content, then click Save.
The + Add document button is only visible for non-integration folders. For folders backed by an external integration (e.g., Shopify), content is controlled by the integration sync and cannot be added or edited manually.
Editing an Existing Document
You can update any document's title or content directly from the Knowledge section — no re-upload needed.
Go to Training → Knowledge.
Click on the folder that contains the document you want to update.
Click on the document. The editor opens inline.
Update the title and/or content as needed. Type
/to add formatting (headings and lists).Click Save. Changes go live instantly.
Tips
Keep titles clear and specific: the AI uses the title to decide whether to reference a document when answering a question.
Keep content concise: aim for a maximum of ~1,000 characters per document.
For large batches of content, use CSV upload instead of creating documents one by one.
The + Add document button is hidden for integration-backed folders (e.g., Shopify), content there is controlled by the integration sync.