Connecting Shopify
Last updated: September 11, 2026
To be able to enable the Shopify integration via your Engaige environment, you need to first create a Shopify custom application for Engaige using your Shopify Dev Dashboard.
Prerequisite: You must be the Store Owner or a staff member with "Develop Apps" permissions in Shopify. Request your store admin for the correct permissions.
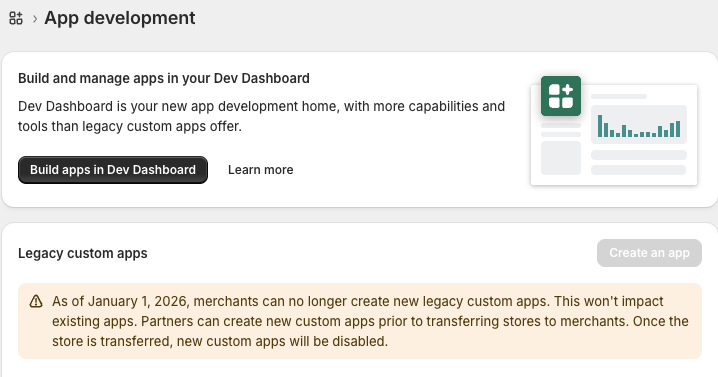
The guide below will show you how to create a custom application via your Shopify Dev Dashboard. Shopify updated the way to create Apps since January 1st 2026. You will need to create the app via the Shopify Dev Dashboard.
Step 1: Create a new app
You can create a new Shopify app right from your Dev Dashboard. If you prefer, you can also enter Dev Dashboard from your Shopify admin page. Go to Apps on the left-panel navigation. Click on Develop apps on top. Afterwards, select Build apps in Dev Dashboard.
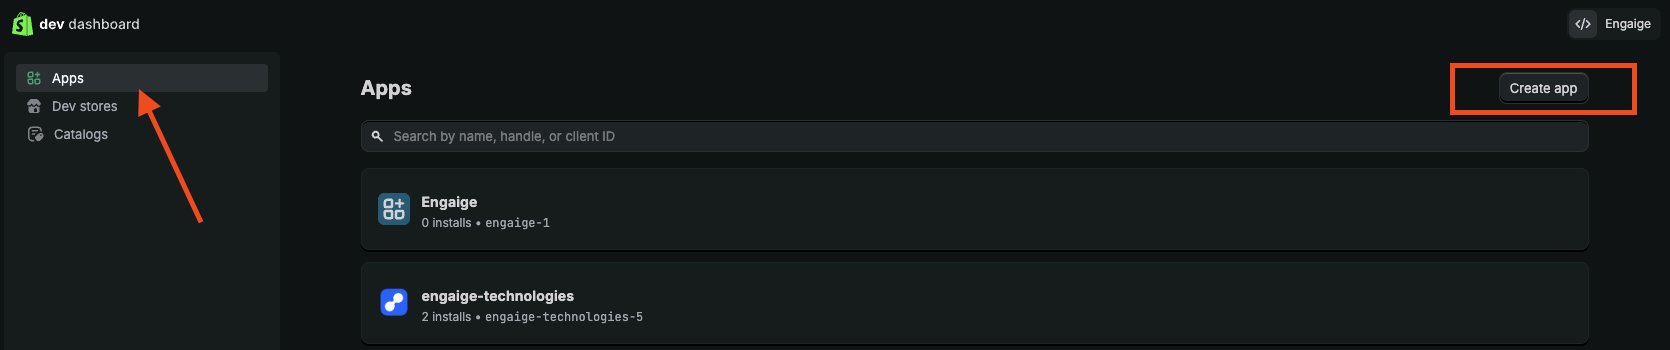
From the Dev Dashboard, be sure you're on Apps in the left-panel navigation and select Create app in the top, right corner of the screen.
Name your app, then select Create.

Step 2: Create a version
Once you've created the app, you can create a version. A version is a snapshot of your app's current configuration, URLs, and settings. Your app must have at least one version before it can be installed on a store.
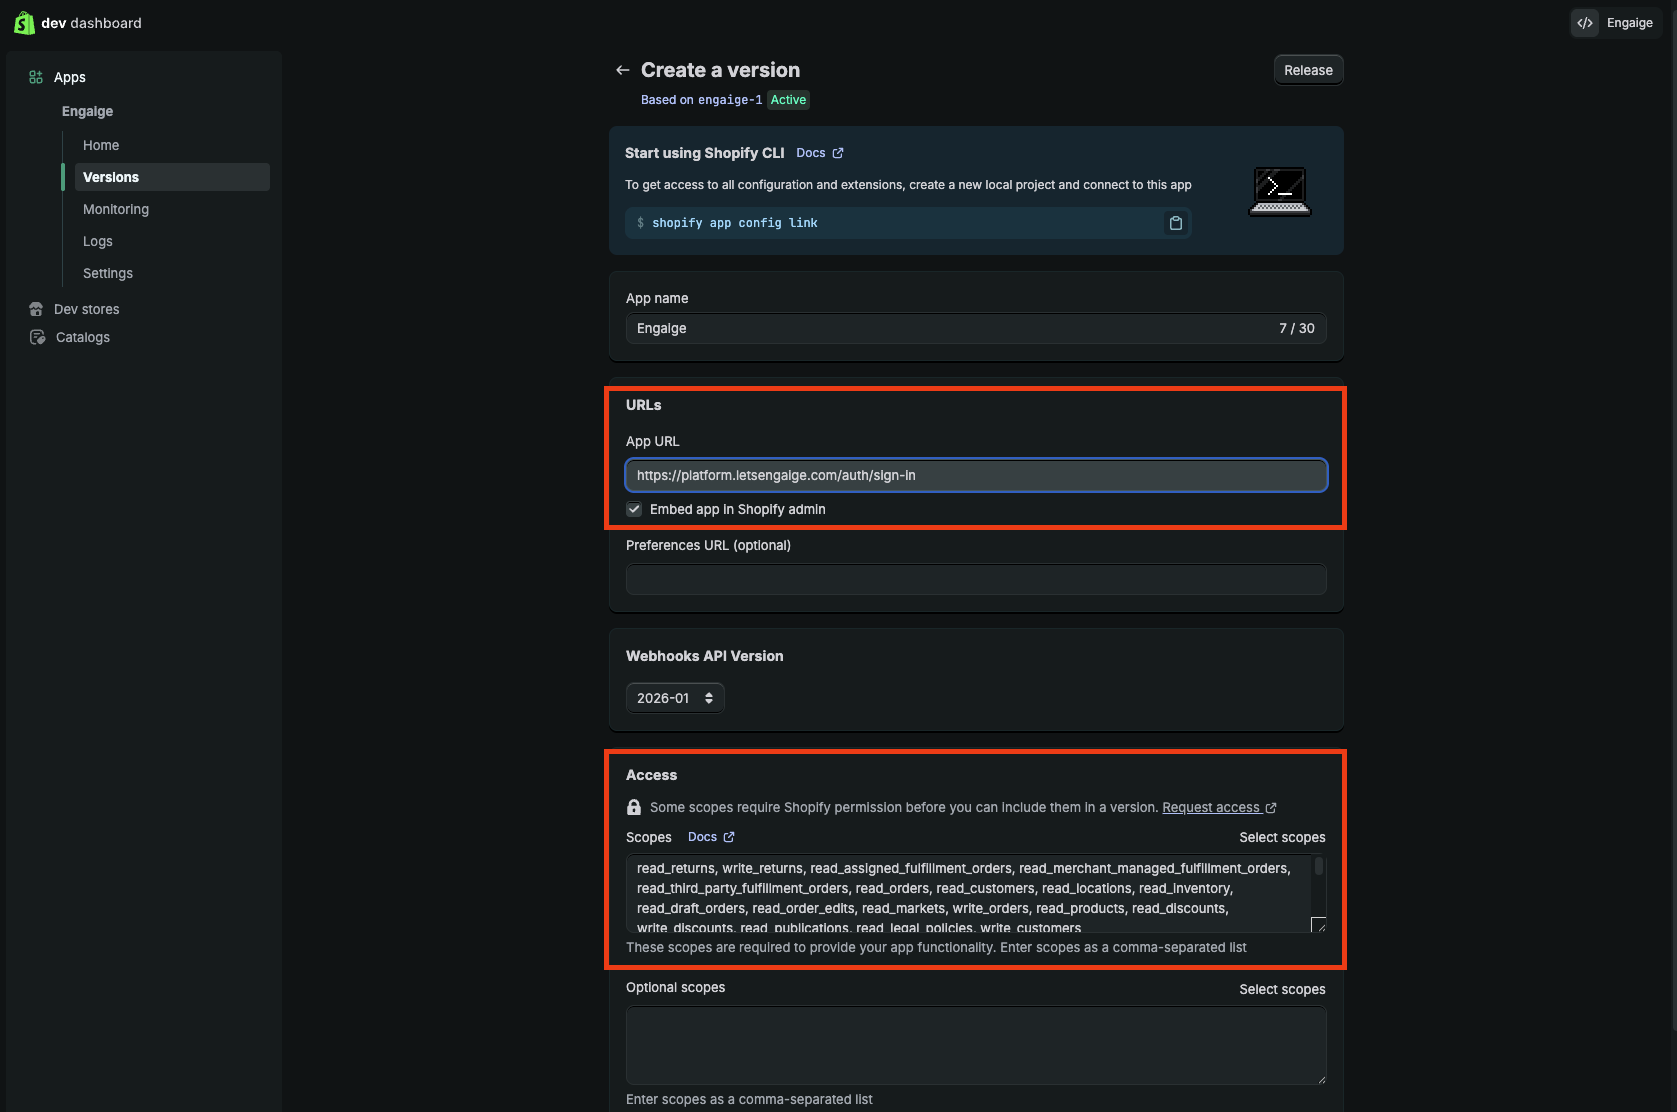
From the Versions tab of your app in the Dev Dashboard, complete your desired fields, including:
Defining your app URL. You can fill the url of your brand or shop. This url will not be used as the app will not be embedded in your Shopify.
Select a Webhooks API version: select the newest version.
Please select the following scopes for Engaige to be able to create Shopify actions for your AI Agent: you can copy and paste all the scopes below at once into the scopes field of Shopify as a comma separated list
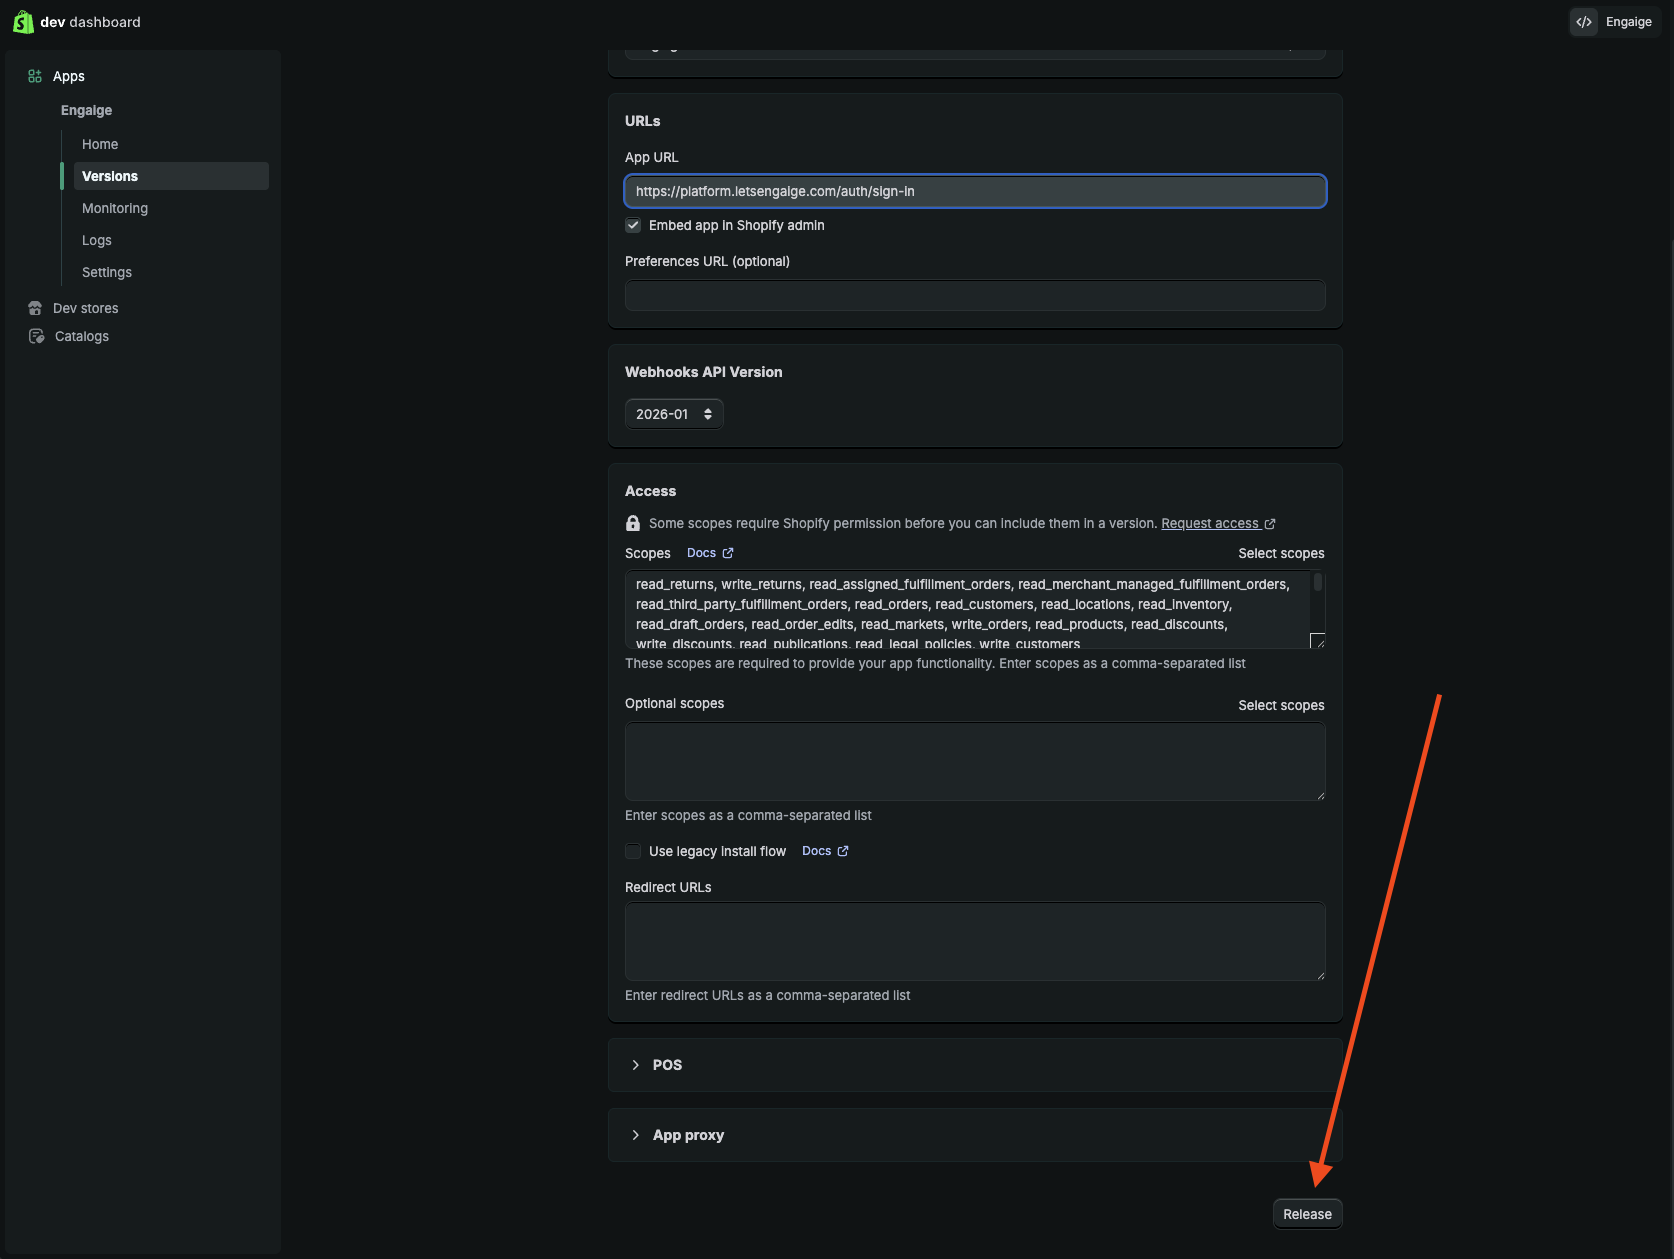
read_returns, write_returns, read_assigned_fulfillment_orders, read_merchant_managed_fulfillment_orders, read_third_party_fulfillment_orders, read_orders, read_customers, read_locations, read_inventory, read_draft_orders, read_order_edits, read_markets, write_orders, read_products, read_discounts, write_discounts, read_publications, read_legal_policies, write_customers, read_all_orders, read_metaobjects, read_metaobject_definitionsSelect Release. Name your version something similar to Engaige
Versions enable you to track changes to your app configuration over time and roll back to previous configurations if needed.
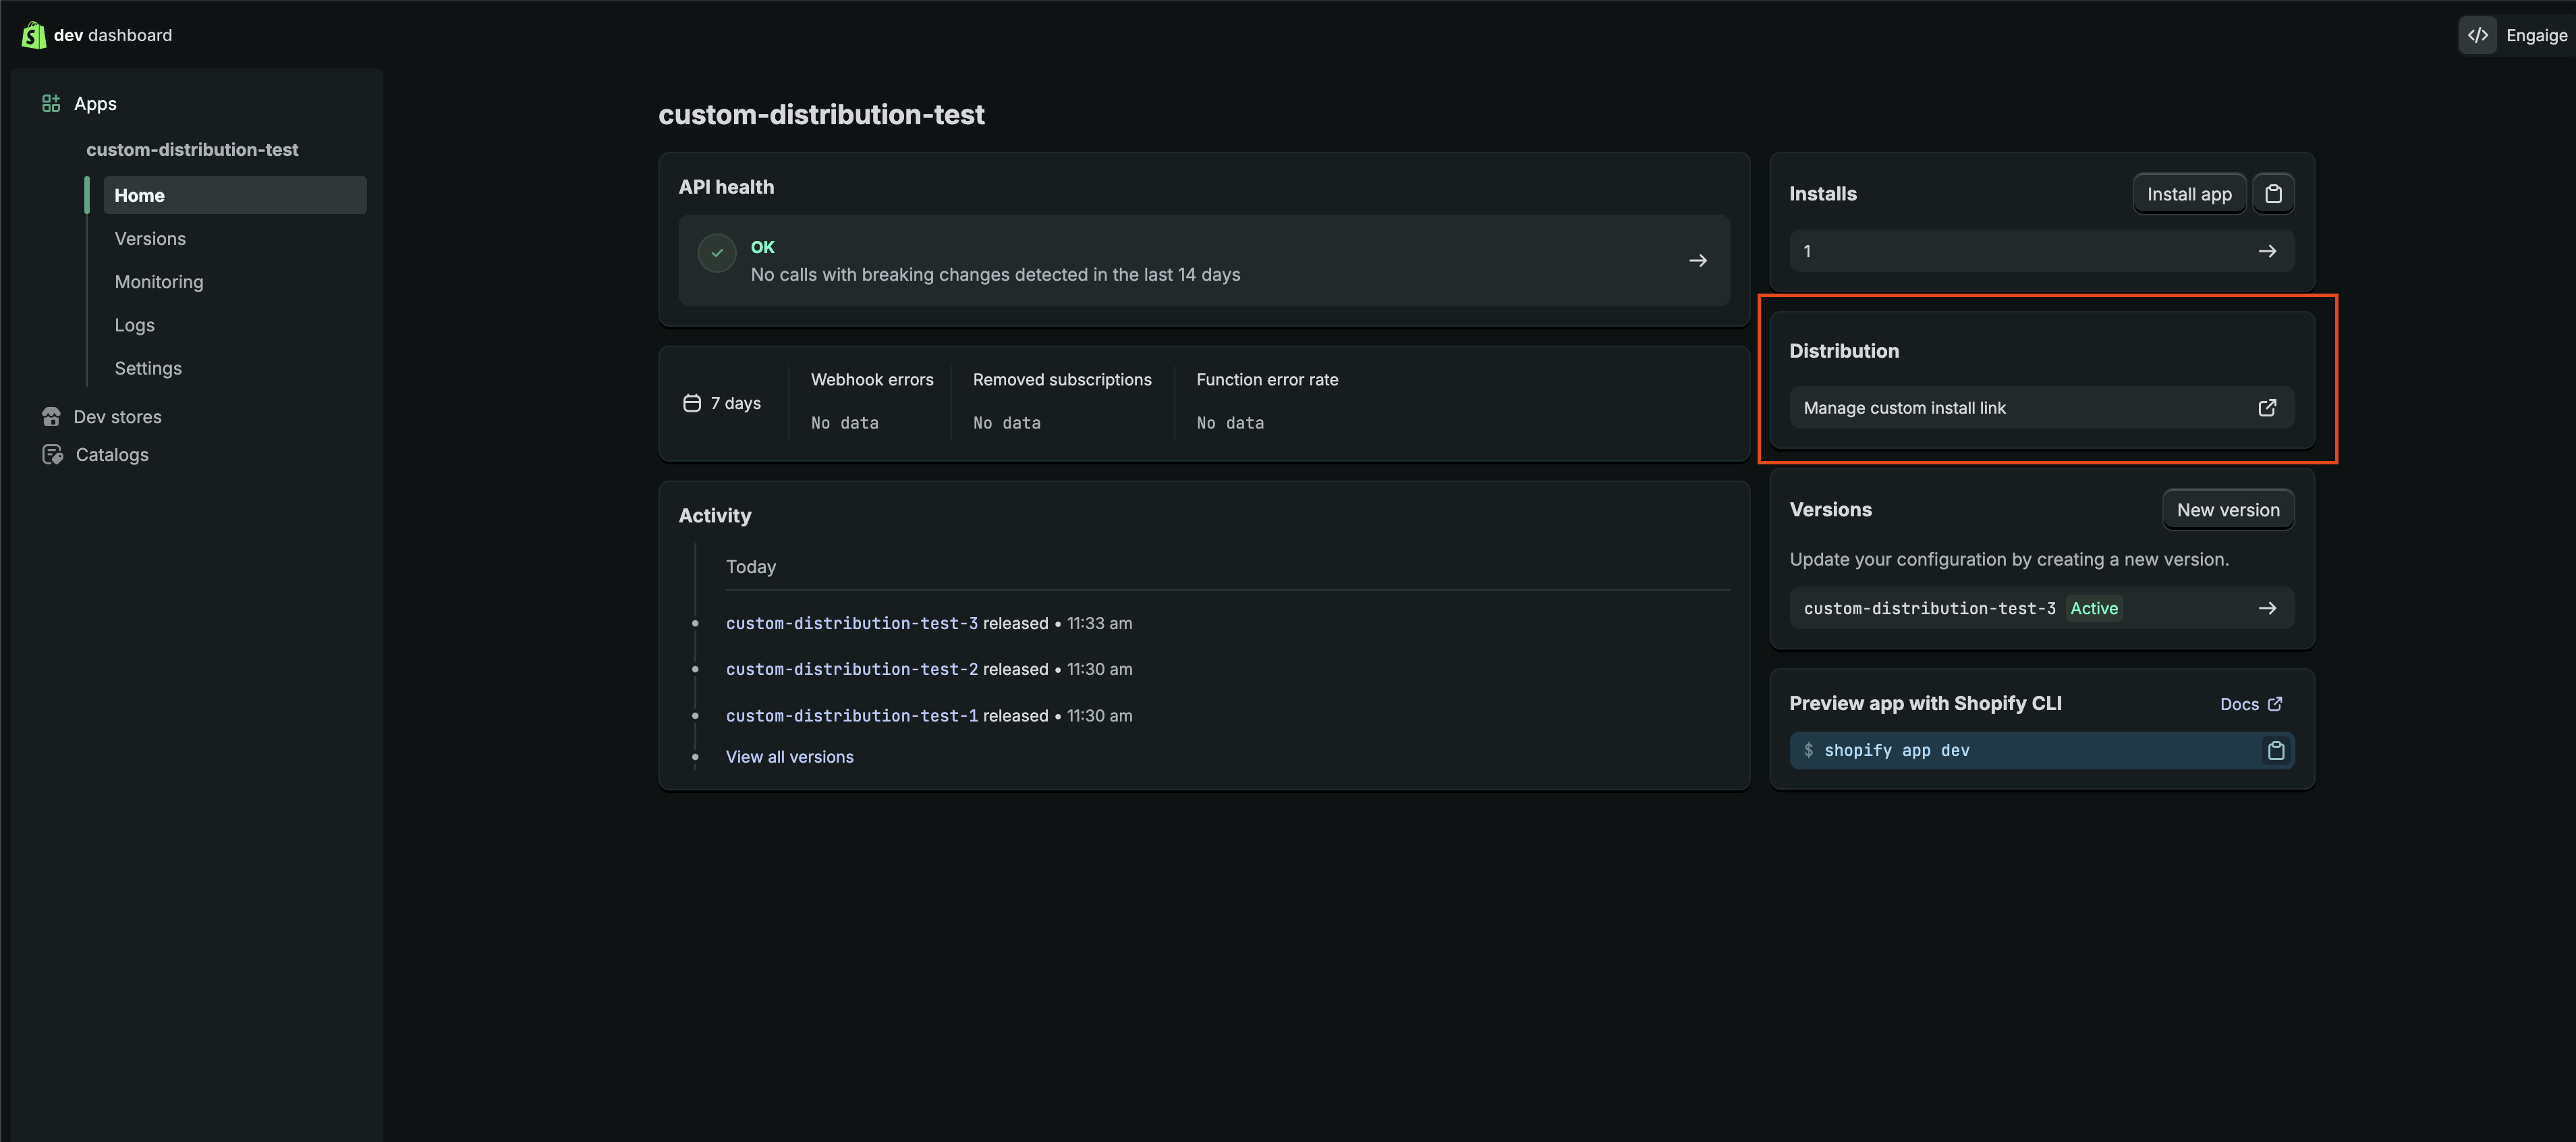
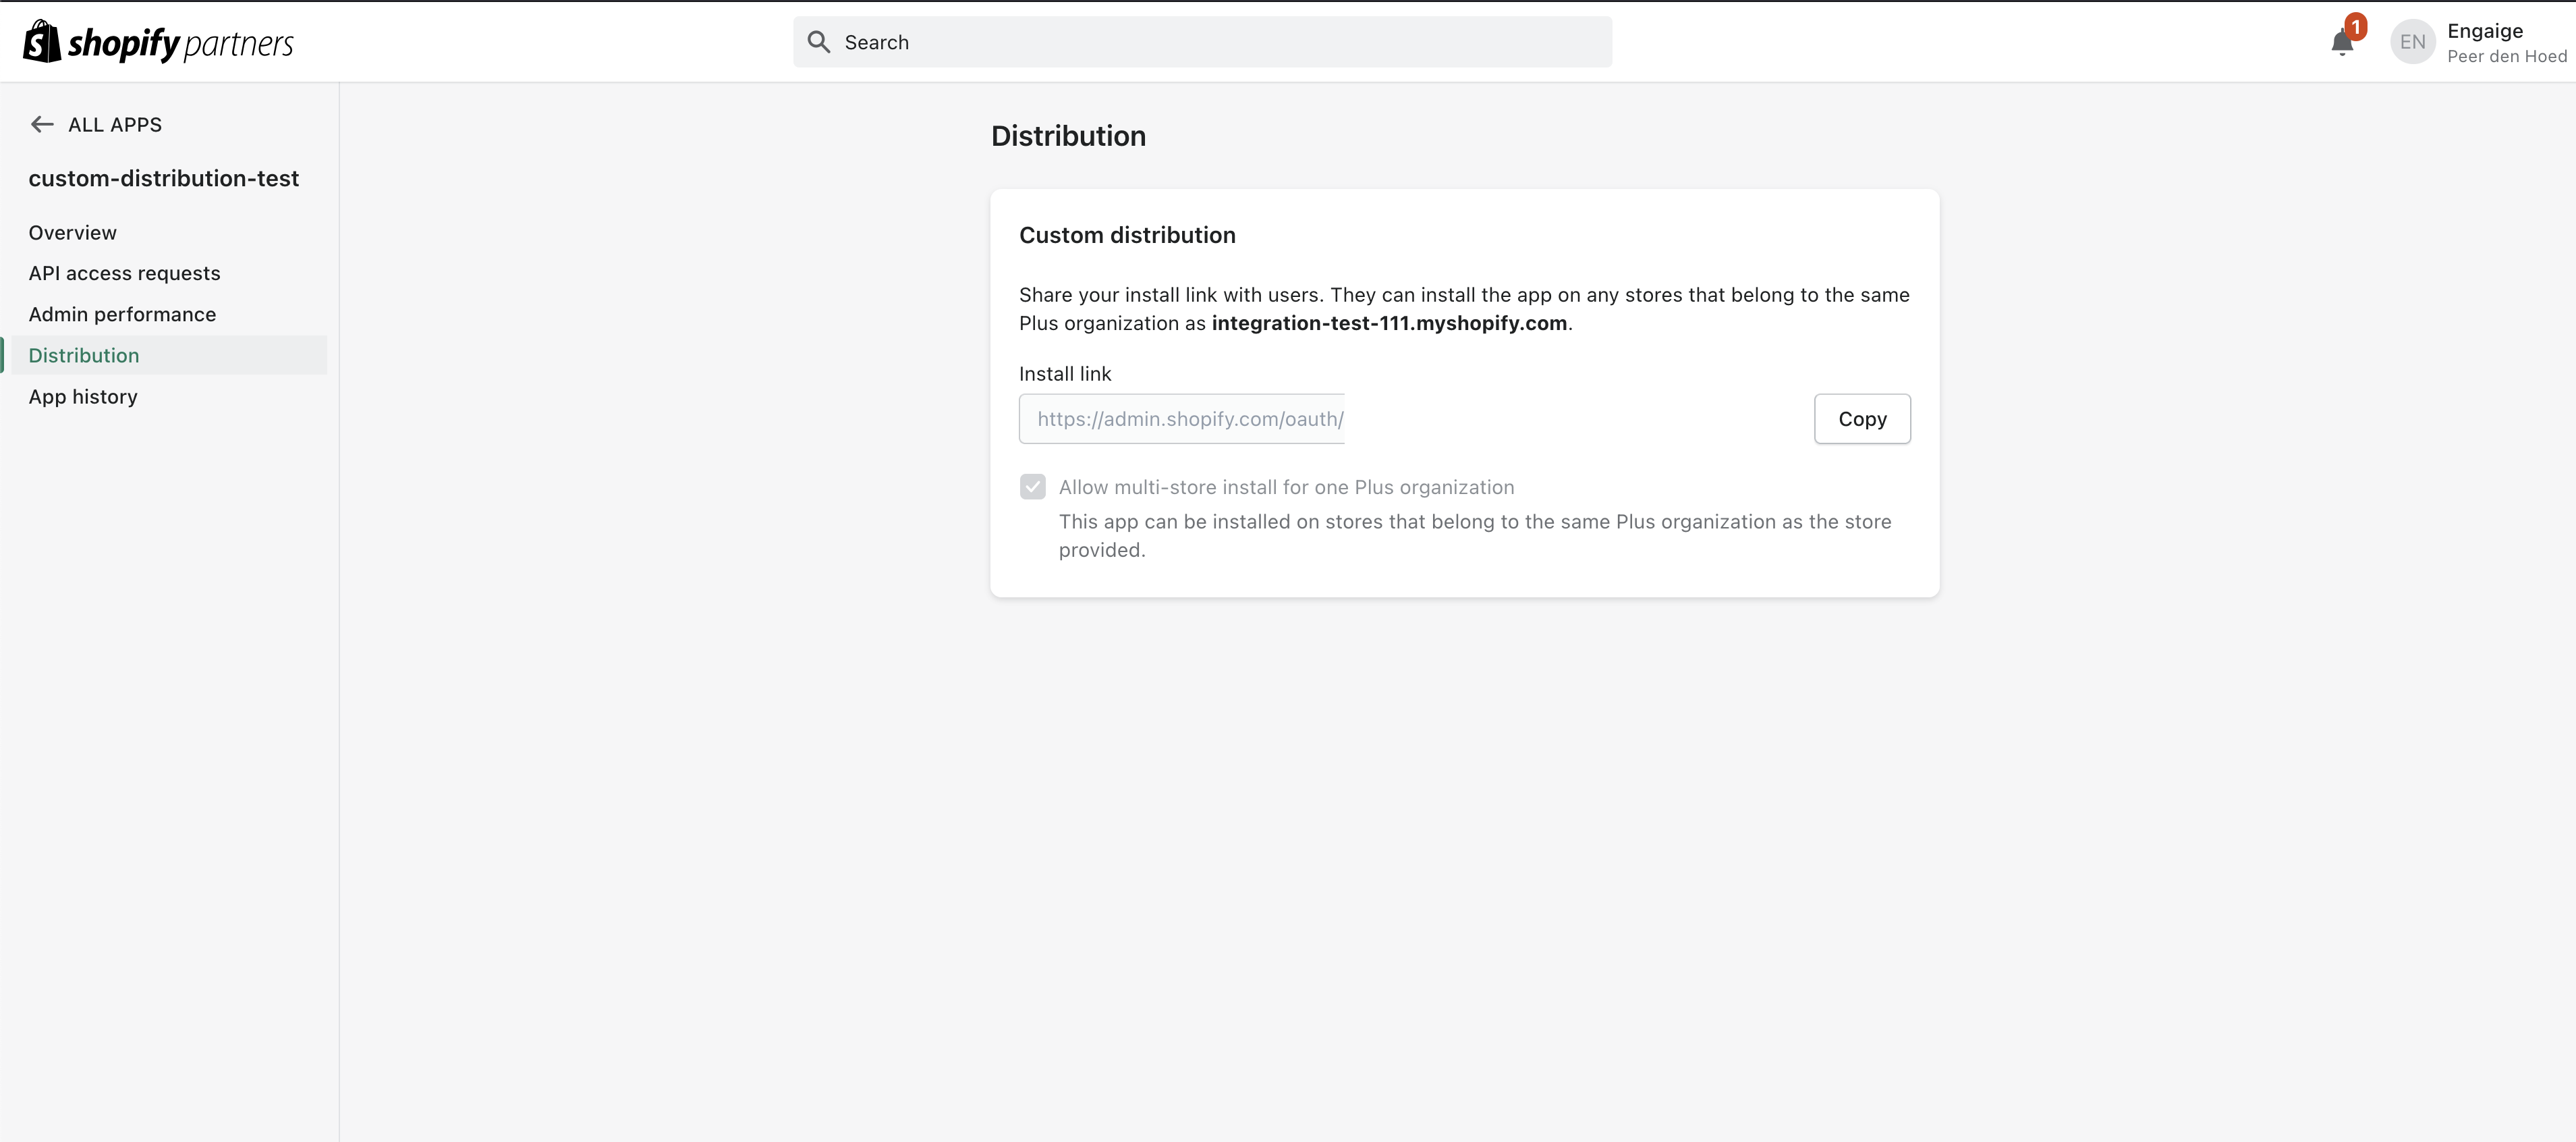
On the App page, click on Home, then click on Manage custom install link. You will be redirected to a different page.
Copy the url you that is shown below Custom Distribution > Install link. Open the link in a new tab.
You will see the store you have in your Shopify environment. Select the store you want to create the app on.
Step 3: Install your app
Complete the following steps to install your app on a store:
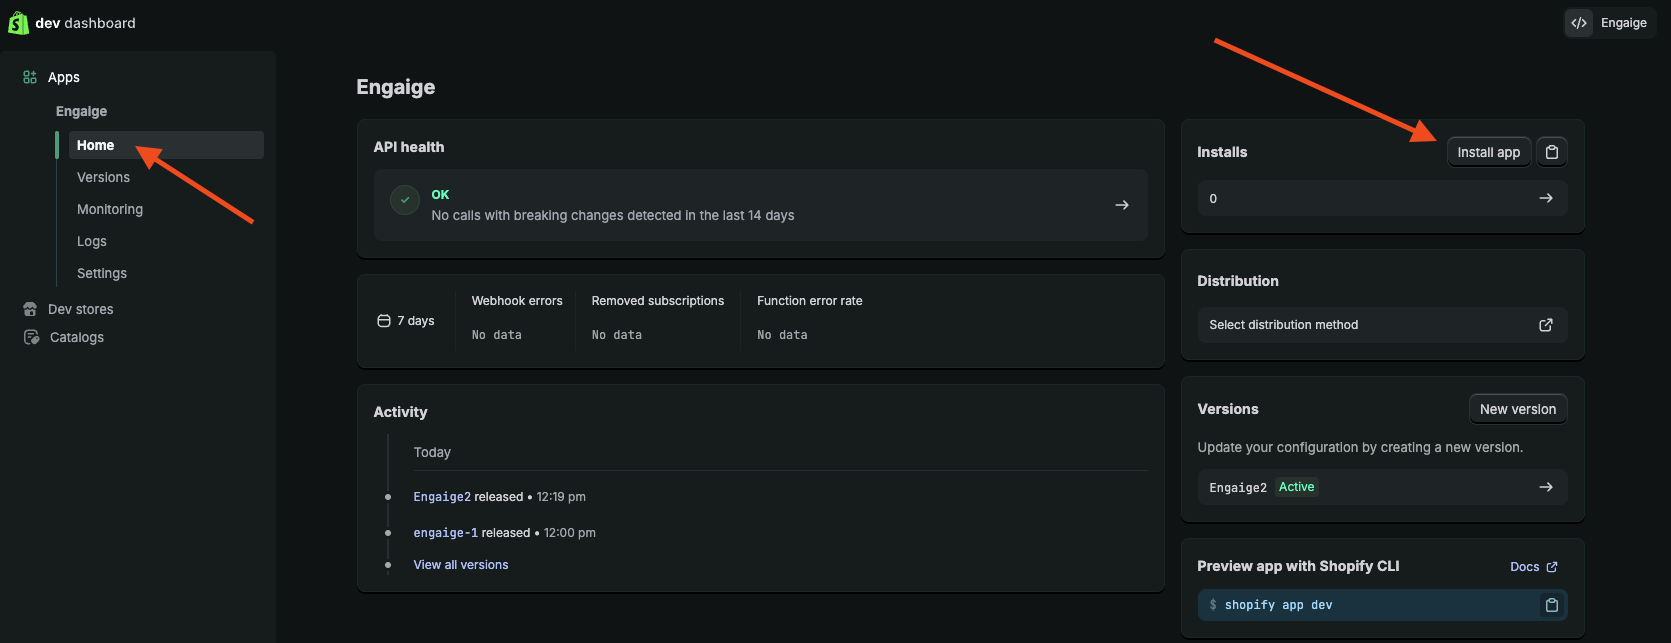
From your app, select Home in the left-panel of the Dev Dashboard.
Scroll down and select Install app.
Select or create the store for your app. It can be that you will be routed to your Shopify Admin page.
Select Install.
Your app is now installed. To start making API calls, you'll need to authenticate your app as described in the next step.
Step 4: Collect credentials of your app
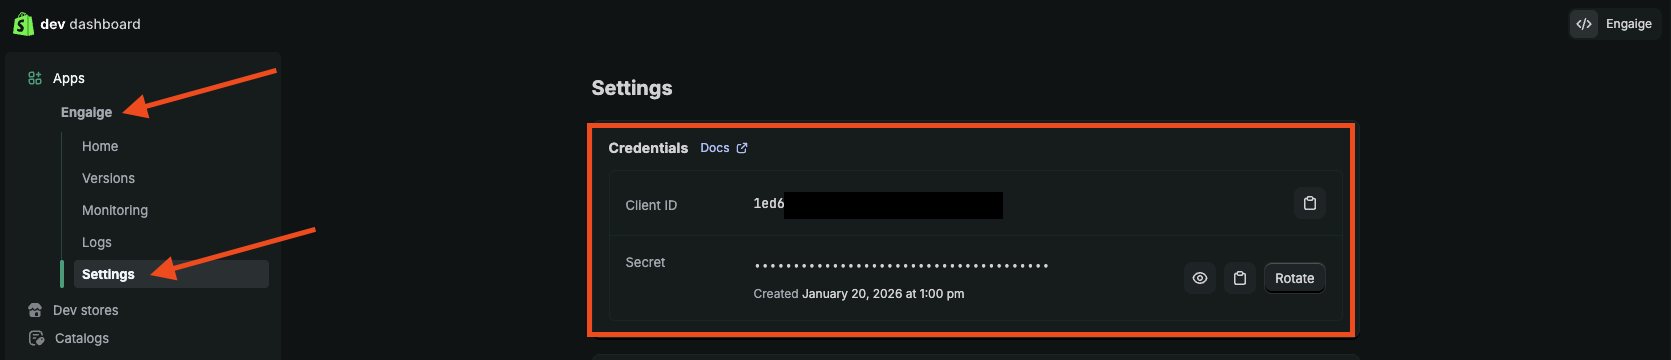
Once you created and installed the custom app, you will need to go to Apps in your Shopify Dev Dashboard:
Click on the created app
Click on Settings
Find Client ID and Secret, you will need those later
Step 5: Enable in Engaige
Open your Engaige Dashboard in a new tab.
Navigate to Settings -> Integrations.
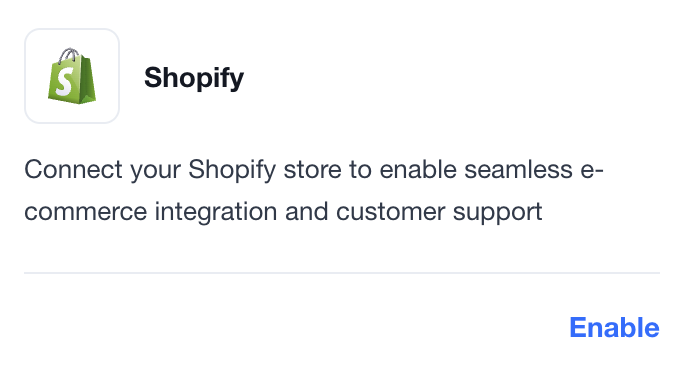
Find Shopify and click Enable.
Fill in the required details from Step 3:
Shop URL: Enter only your store subdomain.
Example: If your admin URL is
my-brand.myshopify.com, entermy-brand.
App Client ID: Paste your Shopify Client ID.
App Client Secret: Paste your Shopify Client Secret.
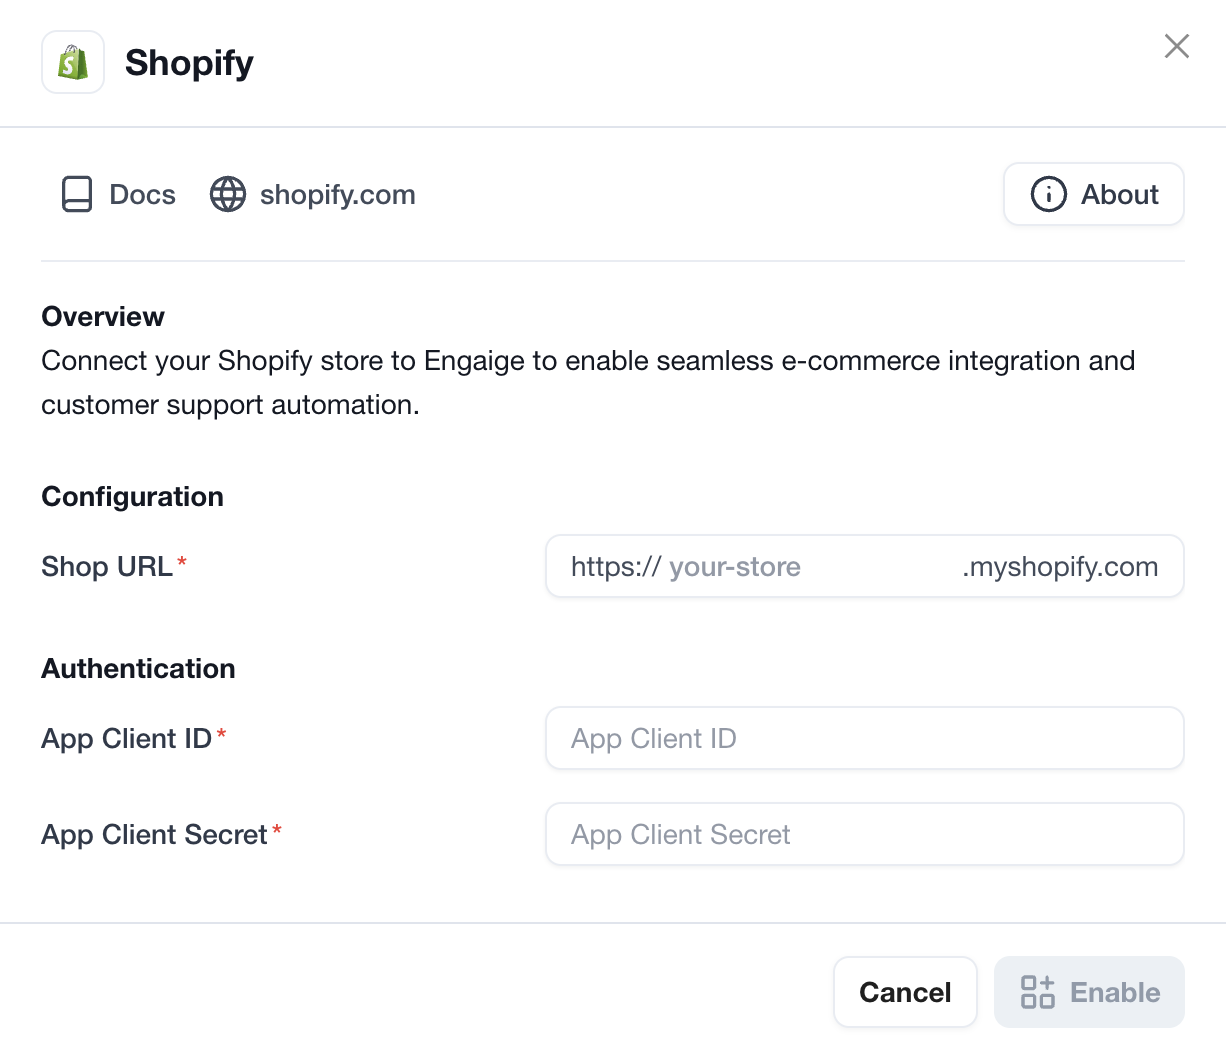
Click Enable.
If successful, the integration is now active. You can now configure specific Shopify actions in the Actions screen.