Connecting Picqer
Last updated: July 14, 2026
Connect your agent to Picqer to enable your AI to provide the latest shipment details and a direct line to your warehouse floor to instantly resolve stock, picking, and backorder inquiries.
Setup
Step 1
In order to connect to Picqer, you will need the following credentials:
Your domain: your domain can be found in the URL of your Picqer dashboard (e.g. https://:your_domain.picqer.com/)
Your API key: must be created from your Picqer dashboard.
Here is how you can quickly create an API key (for full details, refer to the Create an API Key Picqer guide):
Connect to your Picqer dashboard.
Click on the Settings section on the left panel of the screen.
Go to the Access section, and click the API Keys button
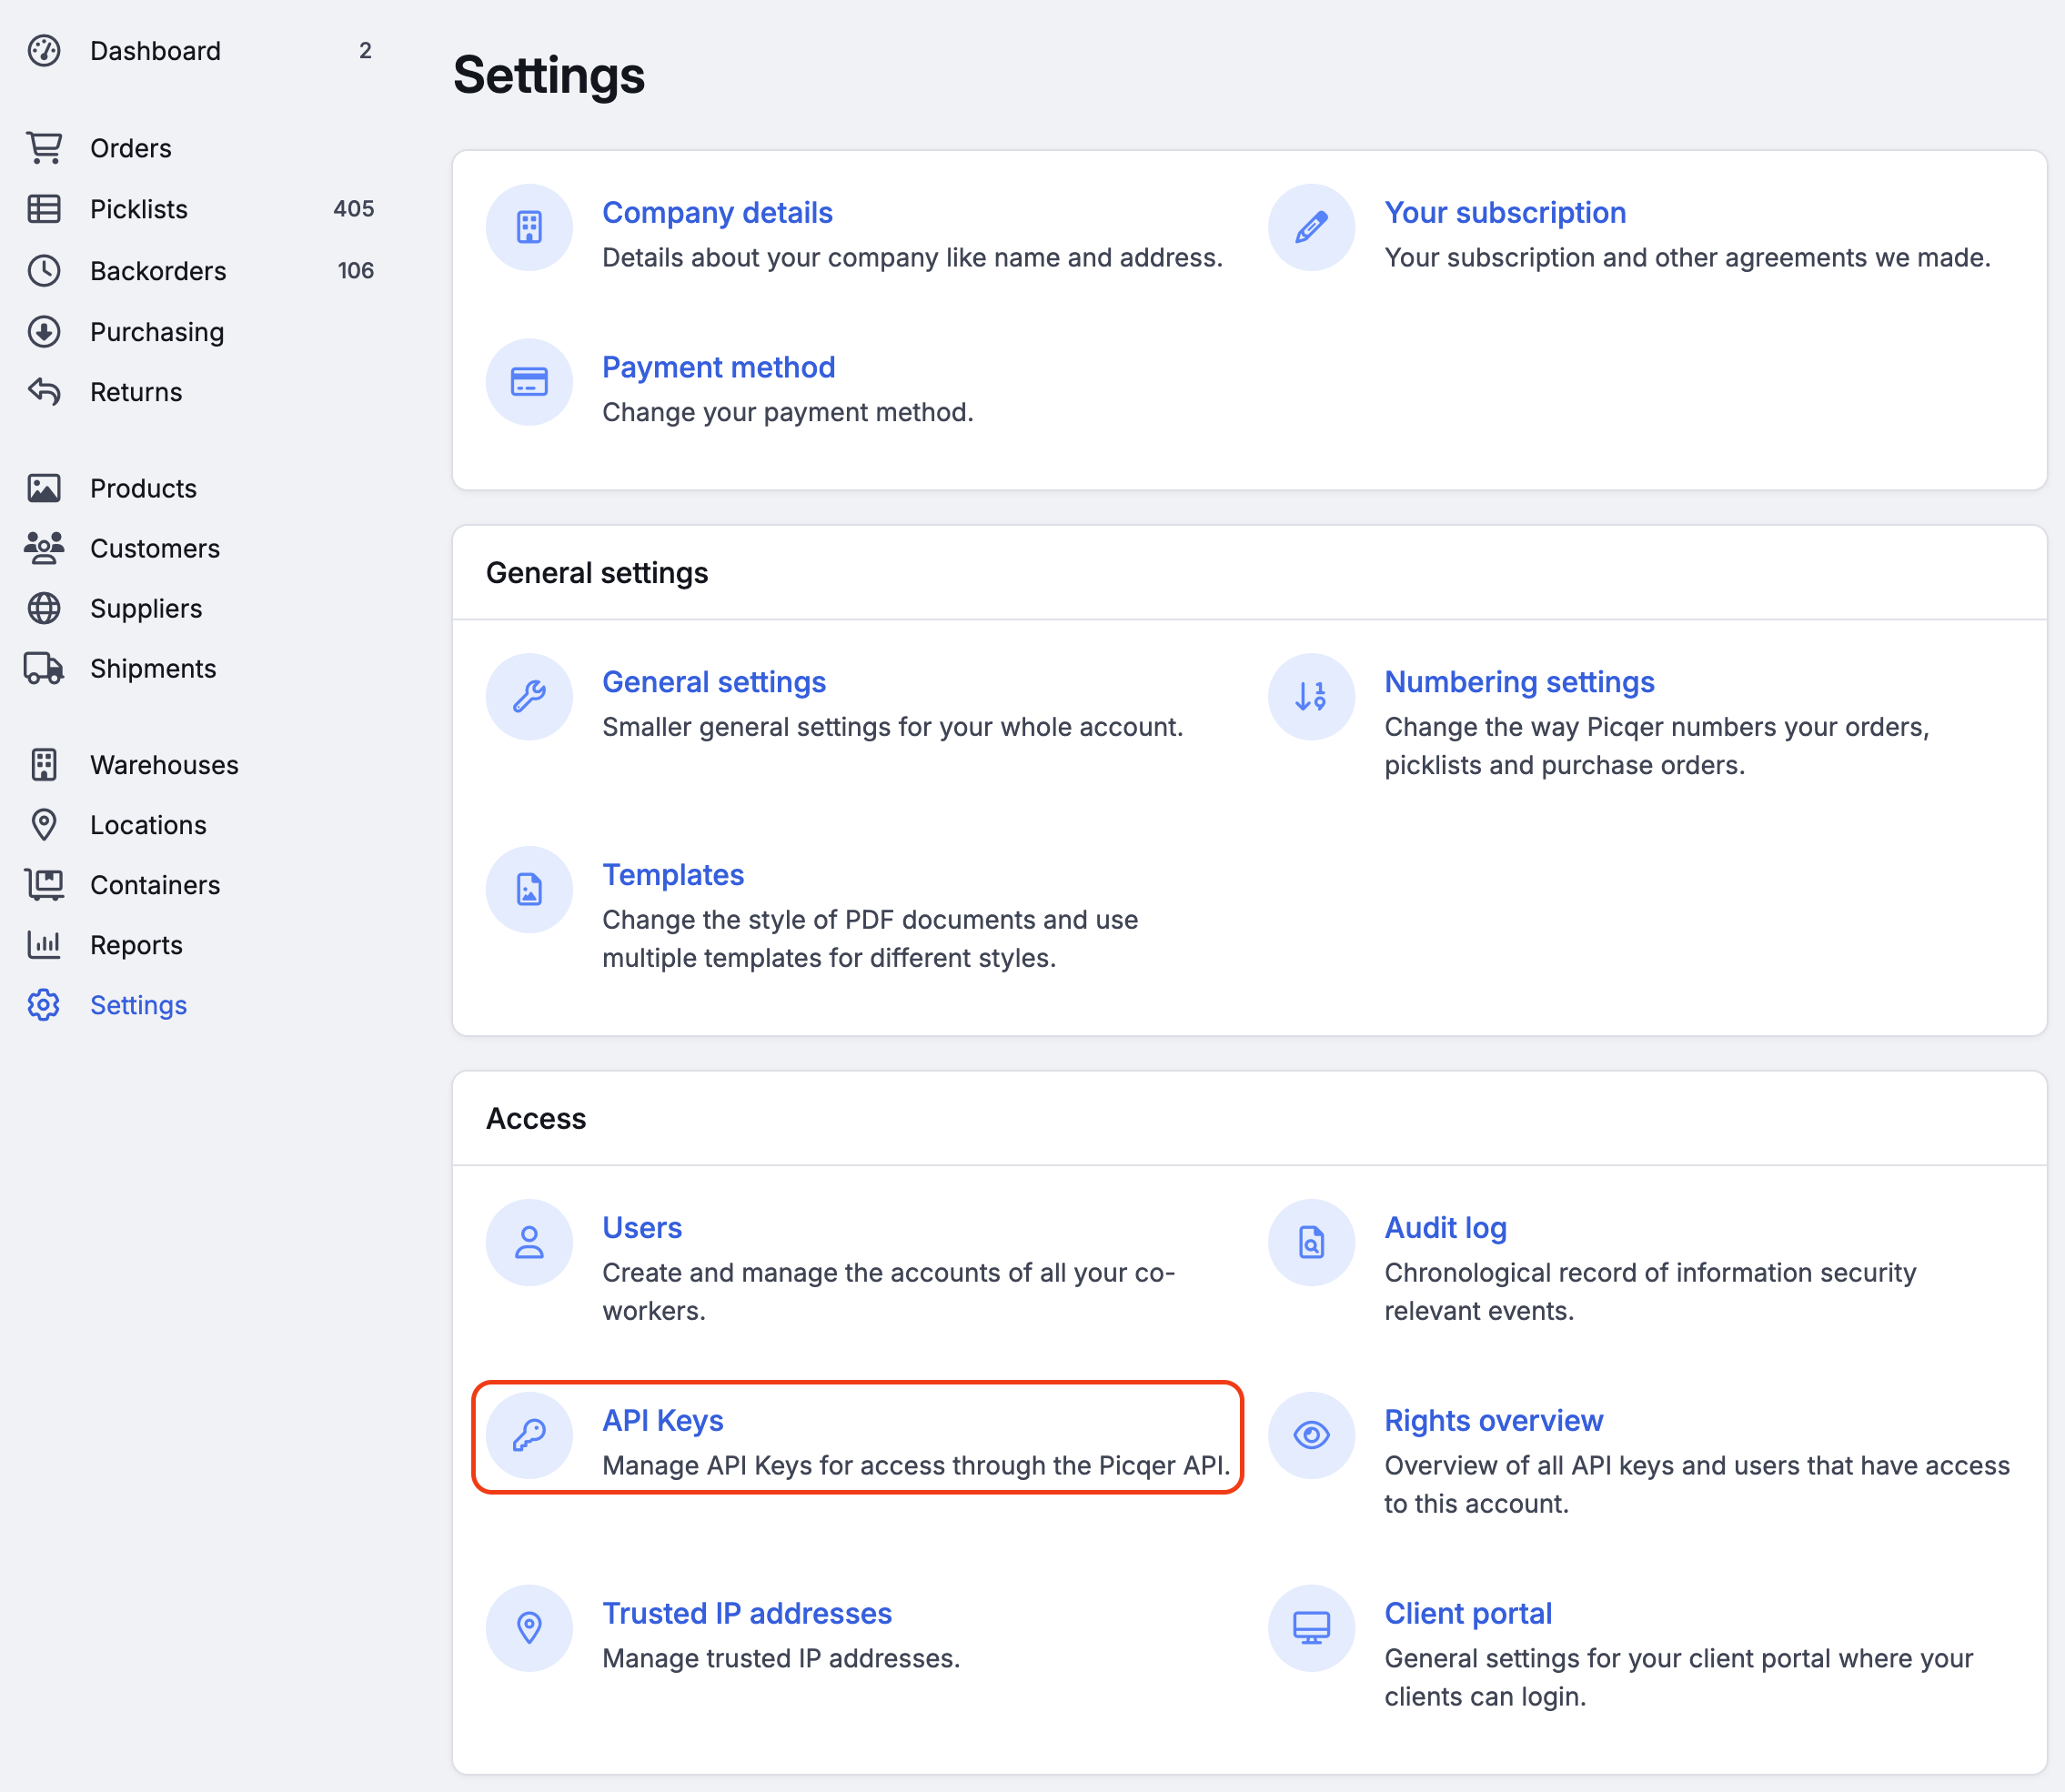
Once there, Create a new api key using the + New API Key button on the top right corner.
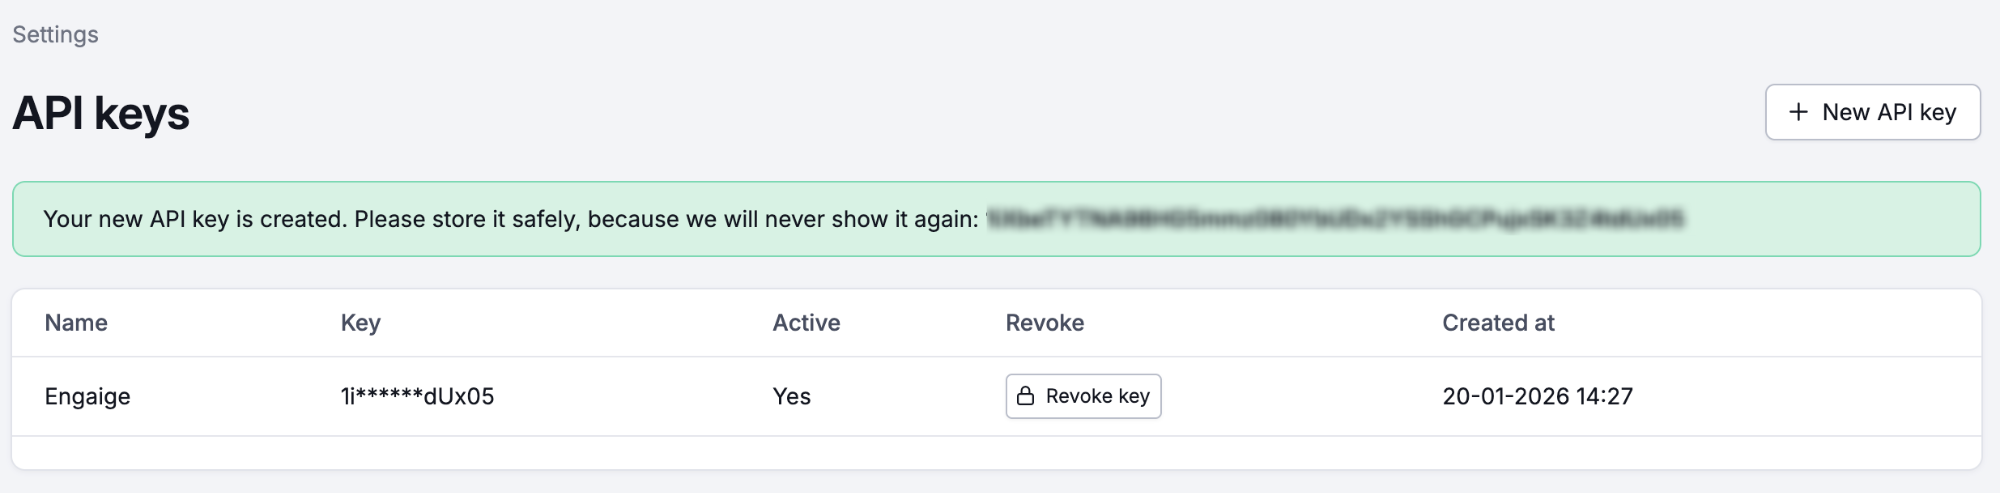
Enter the name of your API key.
Assigning a descriptive name to your API key inside Picqer (in this case
Engaige) facilitates easier identification of the API key associated with each use case.Your API key has been successfully created! Copy it now, as this will be required for the next steps and it will be displayed only once. If you do lose the API key during the process, you can use the Revoke key button to deactivate it and repeat the process to create a new one.
Step 2
You have now all information needed to enable the integration inside Engaige, log in to your Engaige dashboard:
Navigate to the Settings section on the left side panel.
From there, click on the Integrations section.
Click on the Picqer integration Enabled button. If the Picqer integration is not visible, use the search bar at the top right of the page to locate the integration.
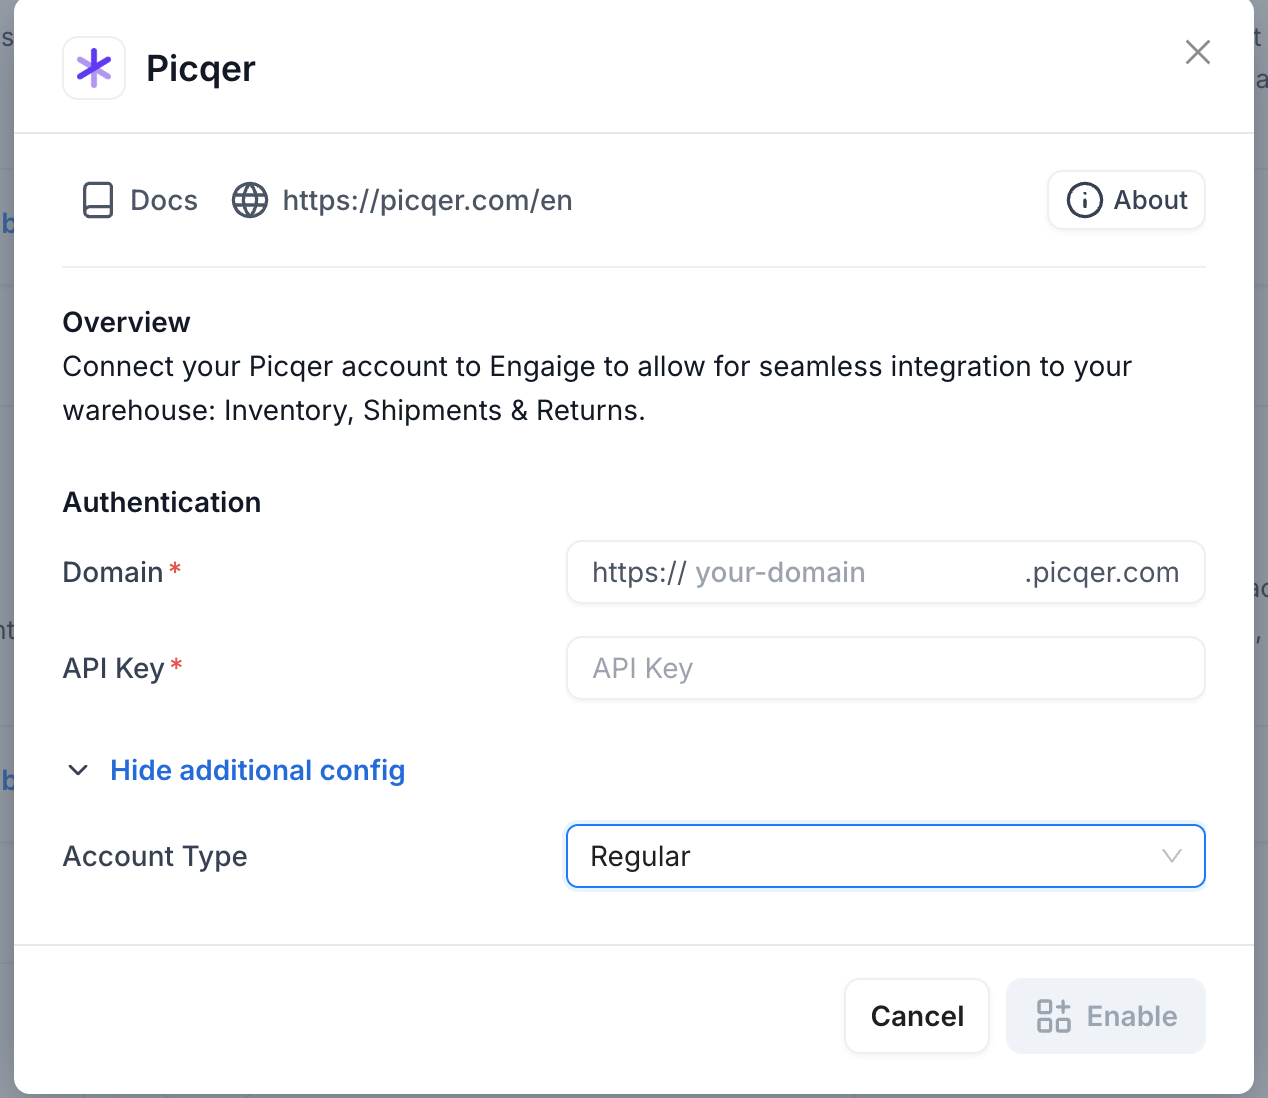
Enter your credentials from Step 1 in the form. Apart from that, open the dropdown Show additional config. Select Regular if you are using Picqer via the regular platform. Select Fulfillment if you are using Picqer via a different fulfillment platform.
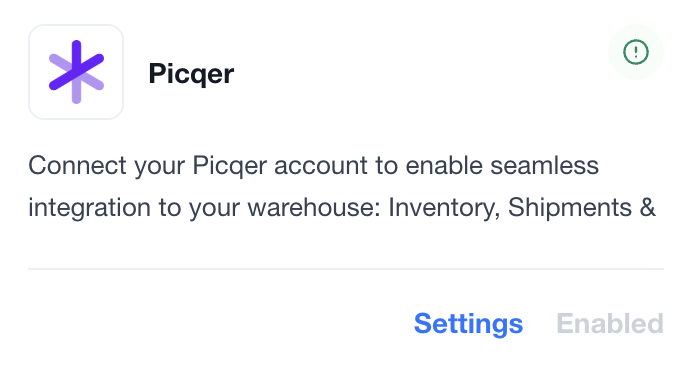
You are now all done ✅ : your Picqer account is now linked to Engaige. If the setup is correct, you will see a green indicator on the integration, confirming that the Picqer integration is now synced with Engaige and that the related actions are unlocked for the agent.
Actions
Enabling the Picqer integration allows you to unlock new actions for your agent. In the Actions view, use the search bar at the top right and search for '{{integration name}}' to display all related actions.
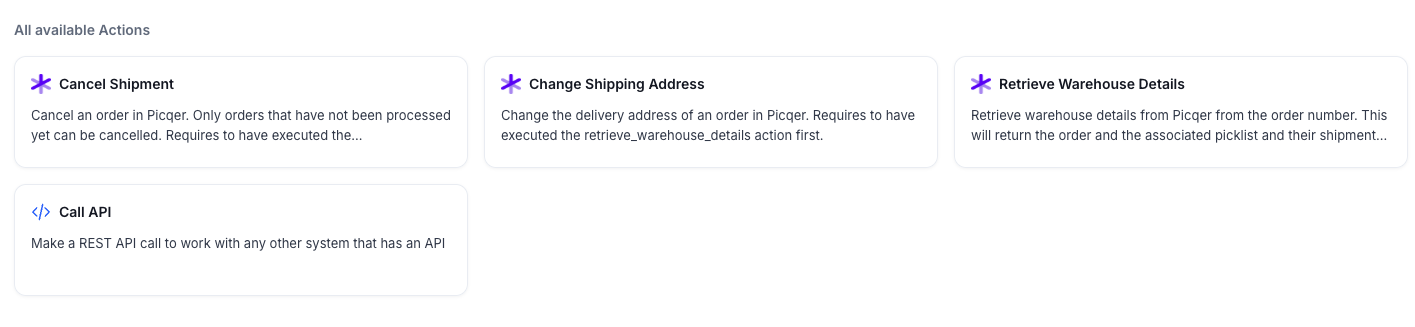
Retrieve Warehouse details
Functionality: This action empowers the agent to retrieve comprehensive warehouse and shipment details using a Picqer order number with either the customer's email address or postal code.
Security & Verification: These parameters serve as a mandatory authentication layer, ensuring the agent verifies the customer's identity prior to processing the request. If either the order number or email address/postal code of the customer is not matching, Picqer will not provide warehouse data.
Data Visibility: Upon successful retrieval, the agent can access:
Order Status: Current progress of the order (concept, expected, processing, paused, completed, cancelled) and status per order line for granular tracking.
Order Information: Complete order details including customer information, delivery and invoice addresses, contact details, customer remarks, and order metadata such as tags, preferred delivery date, and language preferences.
Picklist Details: Status and progress of picklists associated with the order, including the amount of products ordered versus picked, weight, urgency flags, and any pause reasons.
Shipment Information: Detailed shipping data including carrier information, tracking codes, tracking URLs, parcel details, and shipment documents for each picklist.
Backorder Status: Information about ordered products that are out of stock, including expected availability dates, priority levels, purchase status, and reserved stock amounts.
Returns: Associated return details including returned products, replacement products, tracking codes, and receipt dates.
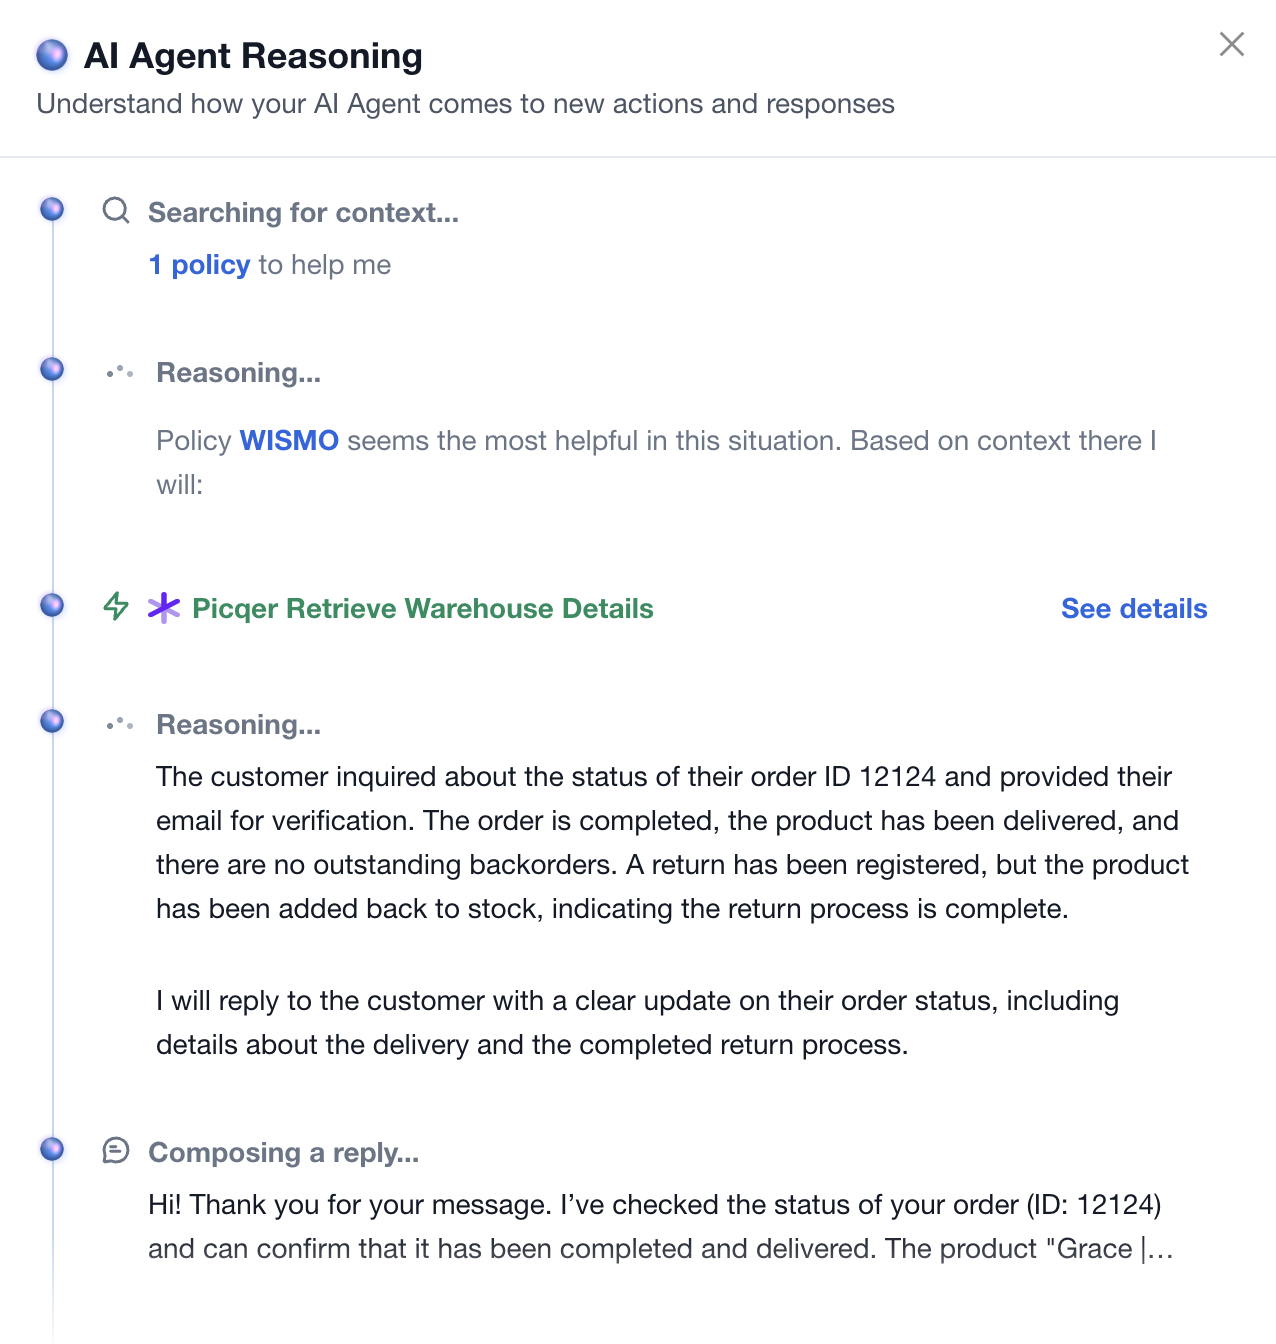
If the action is used by an agent during a conversation, it will appear as shown below. Clicking on the details will display what information is visible to the AI for the given order (see image below).
Cancel Shipment
Functionality: This action allows the agent to cancel an order in Picqer by permanently deleting it. The agent must first execute the Retrieve Warehouse Details action to obtain the Picqer order ID. Only orders with status 'concept' or 'expected' can be cancelled. Orders that have already moved to processing, paused, completed, or cancelled cannot be cancelled.
Security & Verification: Customer identity verification is performed in the Retrieve Warehouse Details action. Since this action requires the Picqer order ID (idorder) returned from that prior call, no additional authentication parameters are needed here. The AI agent should only invoke this action after successfully retrieving warehouse details and confirming the customer's identity.
Data Visibility: Upon successful cancellation, the agent receives:
- Success confirmation: A success flag and message indicating the order has been cancelled.
- Order ID: The idorder that was cancelled, for reference.
Important: Cancelling an order in Picqer will not cancel it in Shopify (or other e-commerce platform). To cancel in both systems, the order must be cancelled in Shopify, which will in turn cancel it in Picqer.
Change Shipping Address
Functionality: This action allows the AI agent to update the delivery (shipping) address of an order in Picqer. The agent must first execute the Retrieve Warehouse Details action to obtain the Picqer order ID (idorder) and the current order information. The agent can then update the delivery address fields with the new address provided by the customer.
Security & Verification: Customer identity verification is performed in the Retrieve Warehouse Details action. Since this action requires the Picqer order ID (idorder) returned from that prior call, no additional authentication parameters are needed here. The agent should only invoke this action after successfully retrieving warehouse details and confirming the customer's identity.
Data Visibility: Upon successful update, the agent receives:
- Success confirmation: A message indicating the shipping address has been updated.
- Updated Order Information: The full updated delivery details including recipient name, address, postal code, city, region, country, phone number, and email. The agent can also see the order status and when it was last updated.
Required address details: Street and house number, postal or ZIP code, city, and country (two-letter country code, e.g. NL, DE).
Optional details: Recipient or company name, contact person, second address line (e.g. apartment or floor), region or state. If the customer does not provide a new phone number or email, the agent will keep the existing contact details from the order.
Support
Are you experiencing issues integrating with Picqer or interested in additional actions with Picqer?
👉 Please send an email to support@letsengaige.com, with your request, and a member of our team will respond to you promptly.